搜索到
55
篇与
运维
的结果
-
 ubuntu环境安装Harbor记录 Harbor 是一款优秀的开源企业容器镜像仓库。包括了基于web界面的权限管理(RBAC)、LDAP、审计、安全漏洞扫描、镜像验真、管理界面、自我注册、HA 等企业必需的功能,同时针对中国用户的特点,设计镜像复制和中文支持等功能。官网链接:https://goharbor.io/为方便应用开发部署,想要自己搭建Docker 镜像仓库,以下是部署过程。{card-describe title="Ubuntu版本情况"}zhuzl@zhuzl-M9-PRO:/data/software/harbor$ uname -a Linux zhuzl-M9-PRO 6.2.0-26-generic #26~22.04.1-Ubuntu SMP PREEMPT_DYNAMIC Thu Jul 13 16:27:29 UTC 2 x86_64 x86_64 x86_64 GNU/Linux{/card-describe}一、下载安装包根据Harbor官网的引导,可通过github的发布页面下载离线安装包:https://github.com/goharbor/harbor/releases由于国内网络下载速度堪忧,本次下载使用 ghproxy.com 进行代理加速下载,也就是在下载地址前添加 https://ghproxy.com/。下载记录如下:zhuzl@zhuzl-M9-PRO:/data/software$ wget https://ghproxy.com/https://github.com/goharbor/harbor/releases/download/v2.8.4/harbor-offline-installer-v2.8.4.tgz --2023-08-18 08:48:42-- https://ghproxy.com/https://github.com/goharbor/harbor/releases/download/v2.8.4/harbor-offline-installer-v2.8.4.tgz 正在解析主机 ghproxy.com (ghproxy.com)... 192.9.132.155 正在连接 ghproxy.com (ghproxy.com)|192.9.132.155|:443... 已连接。 已发出 HTTP 请求,正在等待回应... 200 OK 长度: 608175520 (580M) [application/octet-stream] 正在保存至: ‘harbor-offline-installer-v2.8.4.tgz’ harbor-offline-installer-v2.8.4.tgz 100%[==============================================================================================>] 580.00M 4.40MB/s 用时 2m 9s 2023-08-18 08:50:52 (4.49 MB/s) - 已保存 ‘harbor-offline-installer-v2.8.4.tgz’ [608175520/608175520]) zhuzl@zhuzl-M9-PRO:/data/software$ 二、解压安装包文件下载下来是一个以 .tgz 格式结尾的压缩文件,我们可以直接使用 tar 解压,解压命令为(需替换X.Y.Z为下载对应的版本):tar -zxvf harbor-offline-installer-vX.Y.Z.tgz解压记录如下:zhuzl@zhuzl-M9-PRO:/data/software$ tar -zxvf harbor-offline-installer-v2.8.4.tgz harbor/harbor.v2.8.4.tar.gz harbor/prepare harbor/LICENSE harbor/install.sh harbor/common.sh harbor/harbor.yml.tmpl zhuzl@zhuzl-M9-PRO:/data/software$ 三、配置及安装搜了下网上的课程,大多都是从配置证书开始的,我部署应用时一般都是应用开启http服务,使用nginx代理的时候再使用SSL证书对外提供https的访问。3.1 配置拷贝解压出来的 harbor.yml.tmpl 文件为 harbor.yml。修改这个配置文件。主要有如下信息需要修改的地方:hostname: 修改为域名https: 根据需要配置,我本处是直接注释掉了harbor_admin_password:管理员密码data_volume: harbor数据目录,这是宿主机的文件目录修改后执行初始化:./prepare初始化日志记录日下:zhuzl@zhuzl-M9-PRO:/data/dockerRoot/apps/harbor$ ./prepareprepare base dir is set to /data/dockerRoot/apps/harborWARNING:root:WARNING: HTTP protocol is insecure. Harbor will deprecate http protocol in the future. Please make sure to upgrade to httpsGenerated configuration file: /config/portal/nginx.confGenerated configuration file: /config/log/logrotate.confGenerated configuration file: /config/log/rsyslog_docker.confGenerated configuration file: /config/nginx/nginx.confGenerated configuration file: /config/core/envGenerated configuration file: /config/core/app.confGenerated configuration file: /config/registry/config.ymlGenerated configuration file: /config/registryctl/envGenerated configuration file: /config/registryctl/config.ymlGenerated configuration file: /config/db/envGenerated configuration file: /config/jobservice/envGenerated configuration file: /config/jobservice/config.ymlGenerated and saved secret to file: /data/secret/keys/secretkeySuccessfully called func: create_root_certGenerated configuration file: /compose_location/docker-compose.ymlClean up the input dirzhuzl@zhuzl-M9-PRO:/data/dockerRoot/apps/harbor$初始化完成后,会在当前目录生成 `docker-compose.yml`文件,此时,我们可以使用 `docker compose` 启动docker 服务啦,日志记录如下:zhuzl@zhuzl-M9-PRO:/data/dockerRoot/apps/harbor$ sudo docker compose up -d[+] Running 9/9 ✔ Container harbor-log Started 0.3s ✔ Container redis Started 0.7s ✔ Container registry Started 1.1s ✔ Container registryctl Started 0.9s ✔ Container harbor-portal Started 0.8s ✔ Container harbor-db Started 1.1s ✔ Container harbor-core Started 1.5s ✔ Container nginx Started 2.0s ✔ Container harbor-jobservice Started 2.1szhuzl@zhuzl-M9-PRO:/data/dockerRoot/apps/harbor$ 对了,执行`docker compose`的时候一定要用`sudo`,否则会出现文件权限相关的报错。 启动完成后,可以通过 `nginx` 配置代理的方式对外提供服务,配置好后,访问出现如下图所示的登录界面: 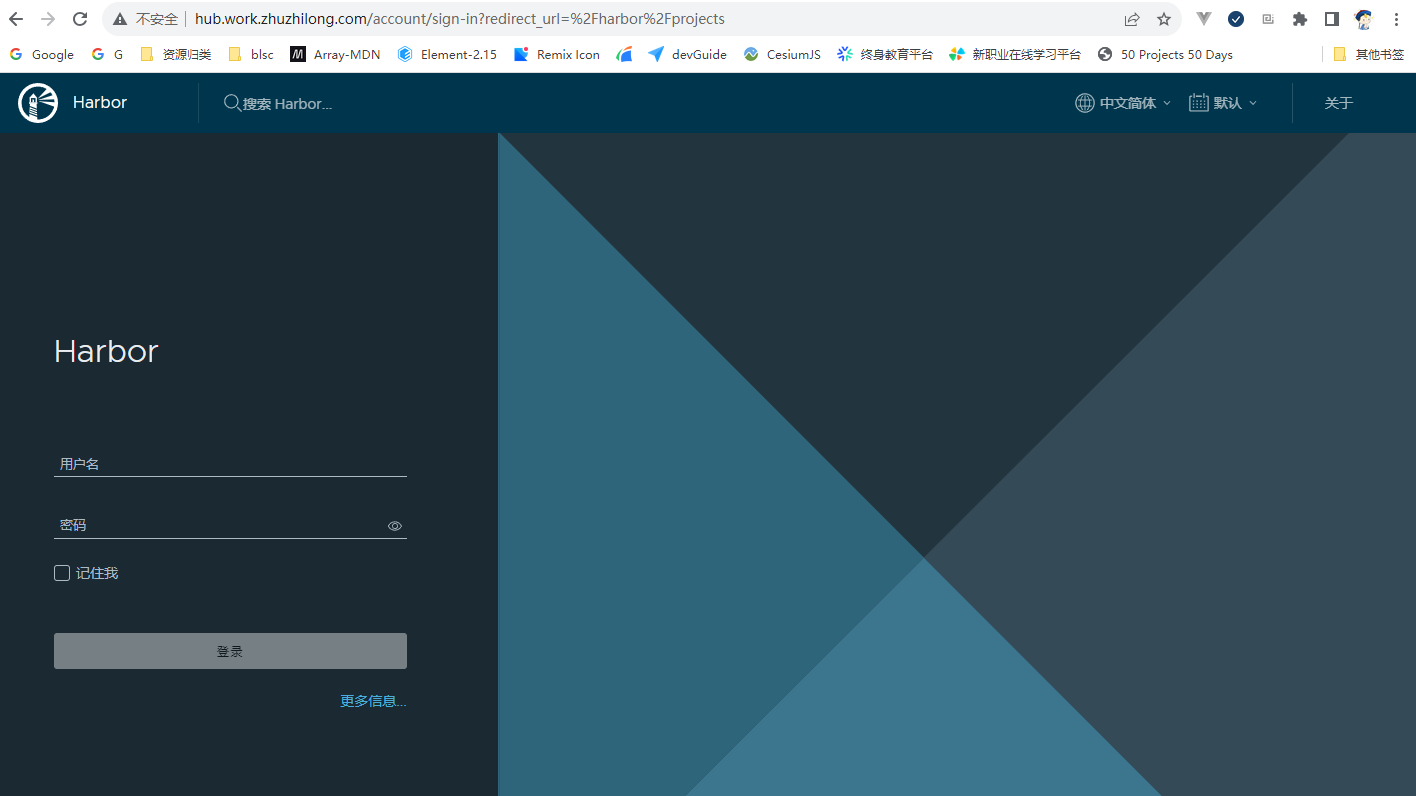 在登录界面可以使用管理员账号 admin,进行登录,密码为在`harbor.yml` 文件中`harbor_admin_password` 配置的默认密码。 登录成功后,主界面如下图所示: 
ubuntu环境安装Harbor记录 Harbor 是一款优秀的开源企业容器镜像仓库。包括了基于web界面的权限管理(RBAC)、LDAP、审计、安全漏洞扫描、镜像验真、管理界面、自我注册、HA 等企业必需的功能,同时针对中国用户的特点,设计镜像复制和中文支持等功能。官网链接:https://goharbor.io/为方便应用开发部署,想要自己搭建Docker 镜像仓库,以下是部署过程。{card-describe title="Ubuntu版本情况"}zhuzl@zhuzl-M9-PRO:/data/software/harbor$ uname -a Linux zhuzl-M9-PRO 6.2.0-26-generic #26~22.04.1-Ubuntu SMP PREEMPT_DYNAMIC Thu Jul 13 16:27:29 UTC 2 x86_64 x86_64 x86_64 GNU/Linux{/card-describe}一、下载安装包根据Harbor官网的引导,可通过github的发布页面下载离线安装包:https://github.com/goharbor/harbor/releases由于国内网络下载速度堪忧,本次下载使用 ghproxy.com 进行代理加速下载,也就是在下载地址前添加 https://ghproxy.com/。下载记录如下:zhuzl@zhuzl-M9-PRO:/data/software$ wget https://ghproxy.com/https://github.com/goharbor/harbor/releases/download/v2.8.4/harbor-offline-installer-v2.8.4.tgz --2023-08-18 08:48:42-- https://ghproxy.com/https://github.com/goharbor/harbor/releases/download/v2.8.4/harbor-offline-installer-v2.8.4.tgz 正在解析主机 ghproxy.com (ghproxy.com)... 192.9.132.155 正在连接 ghproxy.com (ghproxy.com)|192.9.132.155|:443... 已连接。 已发出 HTTP 请求,正在等待回应... 200 OK 长度: 608175520 (580M) [application/octet-stream] 正在保存至: ‘harbor-offline-installer-v2.8.4.tgz’ harbor-offline-installer-v2.8.4.tgz 100%[==============================================================================================>] 580.00M 4.40MB/s 用时 2m 9s 2023-08-18 08:50:52 (4.49 MB/s) - 已保存 ‘harbor-offline-installer-v2.8.4.tgz’ [608175520/608175520]) zhuzl@zhuzl-M9-PRO:/data/software$ 二、解压安装包文件下载下来是一个以 .tgz 格式结尾的压缩文件,我们可以直接使用 tar 解压,解压命令为(需替换X.Y.Z为下载对应的版本):tar -zxvf harbor-offline-installer-vX.Y.Z.tgz解压记录如下:zhuzl@zhuzl-M9-PRO:/data/software$ tar -zxvf harbor-offline-installer-v2.8.4.tgz harbor/harbor.v2.8.4.tar.gz harbor/prepare harbor/LICENSE harbor/install.sh harbor/common.sh harbor/harbor.yml.tmpl zhuzl@zhuzl-M9-PRO:/data/software$ 三、配置及安装搜了下网上的课程,大多都是从配置证书开始的,我部署应用时一般都是应用开启http服务,使用nginx代理的时候再使用SSL证书对外提供https的访问。3.1 配置拷贝解压出来的 harbor.yml.tmpl 文件为 harbor.yml。修改这个配置文件。主要有如下信息需要修改的地方:hostname: 修改为域名https: 根据需要配置,我本处是直接注释掉了harbor_admin_password:管理员密码data_volume: harbor数据目录,这是宿主机的文件目录修改后执行初始化:./prepare初始化日志记录日下:zhuzl@zhuzl-M9-PRO:/data/dockerRoot/apps/harbor$ ./prepareprepare base dir is set to /data/dockerRoot/apps/harborWARNING:root:WARNING: HTTP protocol is insecure. Harbor will deprecate http protocol in the future. Please make sure to upgrade to httpsGenerated configuration file: /config/portal/nginx.confGenerated configuration file: /config/log/logrotate.confGenerated configuration file: /config/log/rsyslog_docker.confGenerated configuration file: /config/nginx/nginx.confGenerated configuration file: /config/core/envGenerated configuration file: /config/core/app.confGenerated configuration file: /config/registry/config.ymlGenerated configuration file: /config/registryctl/envGenerated configuration file: /config/registryctl/config.ymlGenerated configuration file: /config/db/envGenerated configuration file: /config/jobservice/envGenerated configuration file: /config/jobservice/config.ymlGenerated and saved secret to file: /data/secret/keys/secretkeySuccessfully called func: create_root_certGenerated configuration file: /compose_location/docker-compose.ymlClean up the input dirzhuzl@zhuzl-M9-PRO:/data/dockerRoot/apps/harbor$初始化完成后,会在当前目录生成 `docker-compose.yml`文件,此时,我们可以使用 `docker compose` 启动docker 服务啦,日志记录如下:zhuzl@zhuzl-M9-PRO:/data/dockerRoot/apps/harbor$ sudo docker compose up -d[+] Running 9/9 ✔ Container harbor-log Started 0.3s ✔ Container redis Started 0.7s ✔ Container registry Started 1.1s ✔ Container registryctl Started 0.9s ✔ Container harbor-portal Started 0.8s ✔ Container harbor-db Started 1.1s ✔ Container harbor-core Started 1.5s ✔ Container nginx Started 2.0s ✔ Container harbor-jobservice Started 2.1szhuzl@zhuzl-M9-PRO:/data/dockerRoot/apps/harbor$ 对了,执行`docker compose`的时候一定要用`sudo`,否则会出现文件权限相关的报错。 启动完成后,可以通过 `nginx` 配置代理的方式对外提供服务,配置好后,访问出现如下图所示的登录界面:  在登录界面可以使用管理员账号 admin,进行登录,密码为在`harbor.yml` 文件中`harbor_admin_password` 配置的默认密码。 登录成功后,主界面如下图所示:  -
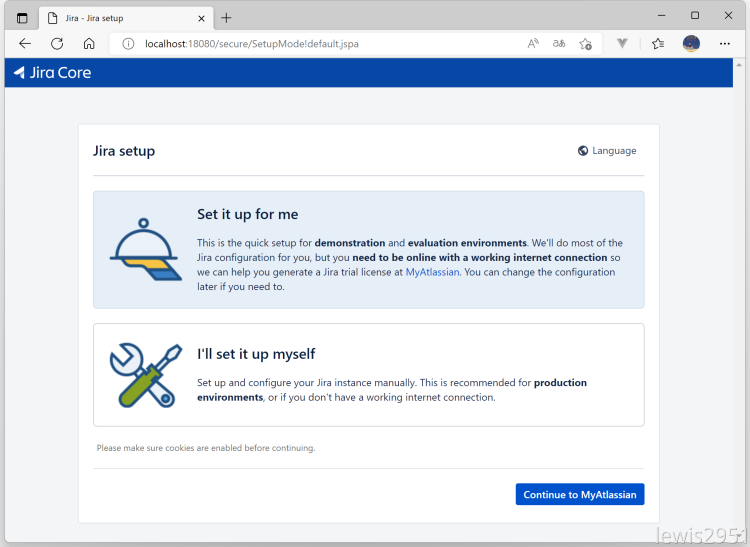
通过Docker Compose安装Jira 由于数据库在服务器上已提前安装好,本处省略MySQL的安装流程。环境说明Jira 相关的文件统一放到 /data/dockerRoot/jira 目录。docker-compose.yml 文件内容如下:version: '3.9' services: jira: container_name: jira image: atlassian/jira-software:latest restart: "no" ports: - 18080:8080 environment: CATALINA_OPTS: -javaagent:/opt/atlassian/jira/atlassian-agent.jar volumes: - ./jira_data:/var/atlassian/application-data/jira - ./libs/atlassian-agent.jar:/opt/atlassian/jira/atlassian-agent.jar - ./libs/mysql-connector-java-8.0.30.jar:/opt/atlassian/jira/lib/mysql-connector-java.jar - ../hosts:/etc/hosts - /etc/timezone:/etc/timezone:ro - /etc/localtime:/etc/localtime:rolibs 目录的文件打包如下:libs.zip启动服务sudo docker compose up -d设置JiraJira 容器启动完毕后,可通过 http://localhost:18080 访问,会自动调整到如下图所示的初始化向导页面:1、设置为中文单击 右上角的「Language」2、我将设置它自己在第二步选择「我将设置它自己」3、数据库连接配置连接数据库选择「其他数据库」,数据库类型根据本地环境进行选择,选择对应的数据库,要提前引入对应数据库的驱动 jar 包。4、设置应用程序属性5、设置许可证如果本地有Java 环境,可以在本地生成许可证,没有的话进入Jira 容器生成也可以执行如下命令,替换对应的服务器ID:java -jar atlassian-agent.jar -d -m test@test.com -n BAT -p jira -o lewis2951 -s B87T-QH0H-UBTM-IU5Q以上命令相关说明如下:java -jar atlassian-agent.jar \ -m zh_season@163.com # Licence Emali \ -n atlassian # Licence Name \ -o atlassian # Licence organization \ -p crowd # Licence product, support: crowd, conf, jira, bitbucket \ -s <copy from website> # License server id以上通过本地环境生成,复制许可证内容到输入框。6、设置管理员根据自己需求设置,Email 可以是一个不存在的,但是建议使用真实Email。7、设置电子邮件通知8、完成部署到此,Jira 就部署完成了。进入欢迎页面,可以创建一个示例项目,9、查看许可证在管理 → 应用程序下可查看许可证信息
-
常用docker 命令 该文档内容主要用于日常记录,会逐步添加重启 docker 服务sudo systemctl daemon-reload sudo systemctl restart docker停止所有运行中的容器docker ps -q | xargs docker stop将当前用户添加到docker用户组,那样就不用每次执行docker命令都加sudosudo usermod -aG docker $USER复制容器中的目录到本地:sudo docker cp <CONTAINER_ID>:/usr/local/tomcat/webapps/ROOT ./temp进入容器sudo docker exec -it mongodb /bin/bash创建网络docker network create --driver=bridge --subnet=192.168.0.0/16 bridge_zzl构建镜像docker build -f ./Dockerfile.devIstio -t console-mobile-ui:0.0.1 .将容器保存为新镜像sudo docker commit nginxProxyManager zhuzl/nginx-proxy-manager:2.11.1-ssl将其他仓库的 docker 镜像推送到本地私服一般用于本地下载外网镜像超级慢的情况,可找台外网的机器 pull,然后 push 到 Docker 私服docker pull ghcr.io/huolalatech/page-spy-web:release docker tag ghcr.io/huolalatech/page-spy-web:release xxx.yyy.zhuzhilong.com/apps/page-spy-web:release docker push xxx.yyy.zhuzhilong.com/apps/page-spy-web:release删除所有未运行的容器;运行的删除不了docker rm $(docker ps -a -q)根据容器的状态删除状态为Exited的容器docker rm $(docker ps -qf status=exited)查看docker日志占用情况及日志清理# /etc/docker/daemon.json 中的 "data-root": "/data/dockerRoot/dataRoot" sudo ls -lh $(sudo find /data/dockerRoot/dataRoot/containers/ -name *-json.log) cat /dev/null > /data/dockerRoot/dataRoot/containers/e876d8da919db8905dece519a81ecc182bc918c20397e5212f2b49e06ec03a01/e876d8da919db8905dece519a81ecc182bc918c20397e5212f2b49e06ec03a01-json.log删除所有tag中带 “none” 关键字的镜像#!/bin/bash # docker rmi $(docker images | grep "none" | awk '{print $3}') TAG=`docker images | grep none| awk '{print $3}'` for tag in $TAG do docker rmi -f $tag done exit 使用 prune 命令删除不再使用的 docker 对象。删除所有未被 tag 标记和未被容器使用的镜像docker image prune
-
处理360路由器不能通过代理在外网访问的问题 缘起2020年的时候,感觉家里的路由实在是太慢了,正好360新出的360WiFi6全屋路由 天穹 V6 路由感觉还蛮不错,就入手了。 使用至今整体还算稳定,功能也能满足大部分使用场景,而且系统自带「自定义hosts」功能,在内网想要使用域名访问部署的服务也就方便多了,虽说不支持泛域名解析,一个一个配有些繁琐,但好歹也省去另外部署DNS的繁琐操作了。只是官方自带的 app 在功能上有不少阉割,像「功能扩展」下的大部分功能就只能通过PC 网页端访问。今年618屯了台配置还不错的迷你主机,准备放在家里长期开机做内网开发服务器用。当然作为一个程序员长期开机的机器,内网穿透肯定是要部署的。上下求索所有准备工作就绪后,想着方便随时配置路由,便把路由通过内网穿透在外网可以随时远程访问。配置好FRP和nginx代理后,登录页面可以正常访问,但是登录后,跳转到主界面,闪一下便又回到登录界面了。问题既然出了,先看看有没有碰到同样问题的小伙伴。便通过360路由官方的社区链接,看看有没有用户反馈相同的问题,于是找到下面这几个反馈同类问题的帖子:360路由P2还是不能通过外网 wan口登录管理?外网怎么访问路由器后台如何在外网下访问路由器的登录界面P1好像不能在外网登录管理页面嘛!!看了一圈,始终没有一个能解决问题的答复,而且看一些标注为「产品答疑师」的回复都不能解决实际反馈的问题,看来是时候施展混迹IT圈多年所学的三脚猫功夫啦。毕竟原理上都是HTTP访问,浏览器发起的HTTP请求只要跟内网请求头信息一致,理论上都是可行的。开始折腾于是通过nginx 代理的地址,真发现如下问题:登录后,发起了「GET /router/get_router_device_capability.cgi」ajax 请求,但是,该接口响应的是302,又重定向到/login.htm登录页面。初步以为是后端对 Host 或 Referer这些头信息做了校验,遂配置nginx相关头信息: proxy_set_header Host http://192.168.0.1; proxy_set_header Referer http://192.168.0.1/login_pc.htm;重启 nginx 再次访问,发现问题依旧。进一步发现请求头中有一个token_id的头信息,值为 undefined,根据 token_id 字符串搜了下网页代码,发现从url获取参数存在问题:该导致了请求的时候根本没获取到用户认证所需的 token_id,导致请求失败。进一步深挖,发现头信息中的 Cookie 是存在 token_id 的:这样的话,是不是可以考虑nginx代理的时候,从Cookie中获取token_id然后设置一个 名为token_id的头请求后端呢?说干就干,一翻摸索后,在nginx配置信息中加入如下信息:set $TOKEN_ID ""; if ($http_cookie ~* "token_id=(.+?)(?=;|$)") { set $TOKEN_ID "$1"; } proxy_set_header token_id "$TOKEN_ID";完整nginx虚拟主机配置信息如下:server { listen 80; server_name router.home.zhuzhilong.cn; location / { proxy_set_header Referer http://192.168.0.1/login_pc.htm; proxy_pass http://192.168.0.1; set $TOKEN_ID ""; if ($http_cookie ~* "token_id=(.+?)(?=;|$)") { set $TOKEN_ID "$1"; } proxy_set_header token_id "$TOKEN_ID"; } }重启路由器,验证成功!!圆满收场最终实现后的效果录屏如下:{dplayer src="/usr/uploads/2023/06/4228503511.mp4"/}
-
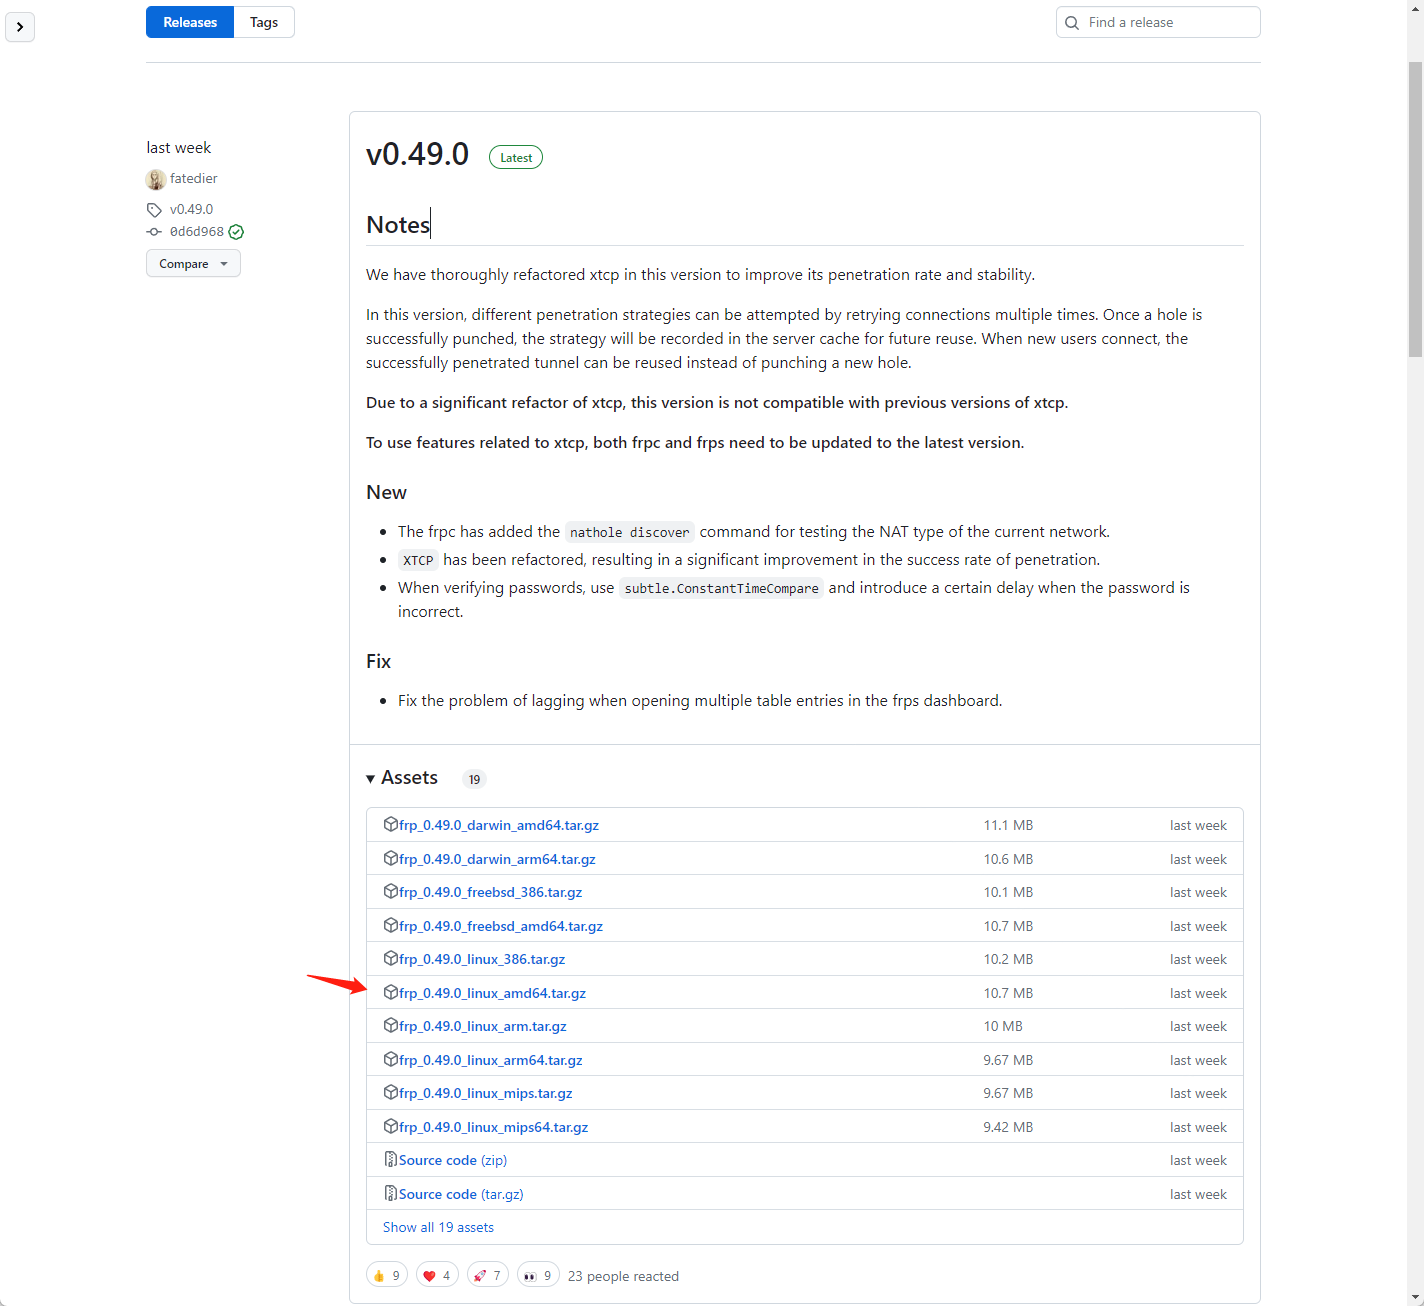
Ubuntu 添加FRP客户端自启动 背景介绍今年618 的时候购置了一台迷你主机,主要用于家庭内部服务器使用,主要基于Docker 部署其他应用,而 Ubuntu 作为 docker 原生支持最好的操作系统,而且还有漂亮的桌面,当然也就成了本迷你主机的操作系统首选。装完系统后,部署的很多应用只能内部使用,为了方便,当然不能只局限于家庭内部环境使用。结合之前不熟的FRP服务端,完全可以对外提供WEB服务,于是便有了本期的教程。下载 FRPFRP 是服务端和客户端打包在一个压缩包文件里的,可以直接从github下载就好。FRP 发布地址:https://github.com/fatedier/frp/releases本处直接下载最新的0.49.0 版本,根据操作系统,本处选择frp_0.49.0_linux_amd64.tar.gz 进行下载:wget https://github.com/fatedier/frp/releases/download/v0.49.0/frp_0.49.0_linux_amd64.tar.gz下载后 解压文件tar -zxvf frp_0.49.0_linux_amd64.tar.gz将解压的文件移动到当前用户有权限的目录,本案例中移动到 /data/apps/frp目录编辑 frpc.ini 文件本处结合实际情况,修改内容如下,部分涉密数据做了调整:[common] server_addr = SERVER_IP server_port = 7000 # for authentication token = TOKEN log_file = /data/apps/frp/frpc.log log_level = info log_max_days = 30 [home_ssh] type = tcp local_ip = 127.0.0.1 local_port = 22 remote_port = 4000 [home_web_pan] type = http local_ip = 127.0.0.1 local_port = 80 http_user = zhuzl http_pwd = PASSWORD subdomain = pan [home_web_kod] type = http local_ip = 127.0.0.1 local_port = 80 http_user = zhuzl http_pwd = PASSWORD subdomain = kod 配置完成后,可直接运行frpc 验证是否OK../frpc若有问题,可检查frpc.ini相关配置信息是否正确配置frpc自启动配置自启动过程中,为避免权限相关问题,本处直接切换为 root 账号添加 frpc.servicevi /etc/systemd/system/frpc.service输入如下服务配置内容[Unit] Description=Frp Client Service After=network.target [Service] Type=simple User=jiuzilong Restart=on-failure RestartSec=5s ExecStart=/data/apps/frp/frpc -c /data/apps/frp/frpc.ini [Install] WantedBy=multi-user.target 启用服务# 启用服务 systemctl enable frpc.service # 禁用服务 systemctl disable frpc.service重启服务systemctl daemon-reload systemctl start frpc验证服务启动状态systemctl status frpc参考链接FRP官方文档: https://gofrp.org/docs/overview/FRP服务端安装并设置开机自启动: https://blog.zhuzhilong.cn/software/install-frps-as-service.html推荐另一种docker compose 的启动方式:version: '3.3' services: frpc: restart: always network_mode: host volumes: - './frpc.ini:/etc/frp/frpc.ini' container_name: frpc image: snowdreamtech/frpc
-
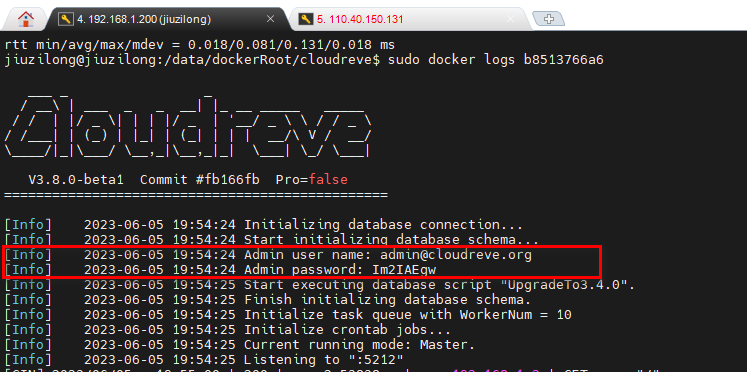
部署Cloudreve 参考链接:https://docs.cloudreve.org/getting-started/install#docker-composedocker-compose.ymlversion: "3.8" services: cloudreve: container_name: cloudreve image: cloudreve/cloudreve:latest restart: unless-stopped ports: - "8004:5212" volumes: - temp_data:/data - ./cloudreve/uploads:/cloudreve/uploads - ./cloudreve/conf.ini:/cloudreve/conf.ini - ./cloudreve/cloudreve.db:/cloudreve/cloudreve.db - ./avatar:/cloudreve/avatar depends_on: - aria2 aria2: container_name: aria2 image: ddsderek/aria2-pro restart: unless-stopped environment: - RPC_SECRET=your_aria_rpc_token - RPC_PORT=6800 - DOWNLOAD_DIR=/data - PUID=1000 - PGID=1000 - UMASK_SET=022 - TZ=Asia/Shanghai volumes: - ./aria2/config:/config - temp_data:/data volumes: temp_data: driver: local driver_opts: type: none device: ./data o: bind 在当前目录创建相关目录及文件mkdir -vp cloudreve/{uploads,avatar} \ && touch cloudreve/conf.ini \ && touch cloudreve/cloudreve.db \ && mkdir -p aria2/config \ && mkdir -p data/aria2 \ && chmod -R 777 data/aria2启动容器docker compose up -d启动后从日志中查看登录账号信息:
-
部署spug 参考: https://www.spug.cc/docs/install-docker创建 docker-compose.ymlversion: '3.9' services: spug: image: openspug/spug-service container_name: spug privileged: true restart: always volumes: - ./service:/data/spug - ./repos:/data/repos ports: - 8002:80 environment: - MYSQL_DATABASE=spug - MYSQL_USER=spug - MYSQL_PASSWORD=Passw0rd - MYSQL_HOST=192.168.1.200 - MYSQL_PORT=3306启动容器docker compose up -d初始化以下操作会创建一个用户名为 zhuzl 密码为 Passw0rd 的管理员账户,可自行替换管理员账户/密码。docker exec spug init_spug zhuzl Passw0rd
-
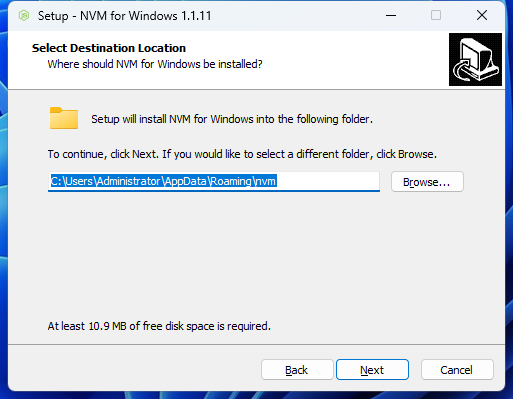
windows 安装nvm 及基本使用 近些年 Node.js 的版本升级比较快,而我们很多项目维护周期也会维持很多年,而维护一些老项目的时候,在一些新版本 Node.js上会报一大堆的错,为了尽快修复 bug,没必要花太多的时间升级一大堆的依赖,而且贸然升级,对于线上在用的项目也存在诸多不确定性方面的隐患。对于前端开发者而言,选择一款方便的多 Node.js 版本控制工具,俨然是非常有必要的。而nvm 是一款可以用于管理多版本 Node.js 的工具,可以根据实际情况,轻松切换项目所需的node 版本,在开发过程中非常便捷,不用手工卸载原版本再下载安装新Node版本。下载github发布页:https://github.com/coreybutler/nvm-windows/releases我选择nvm-setup.exe文件进行下载,也有用于免安装的绿色版文件(nvm-noinstall.zip),那样得下载后解压并手工设置环境变量。安装下载后是一个nvm-setup.exe,安装过程一路 Next即可:安装完成后,打开cmd命令行,输入 nvm version 能正常显示类似下图所示版本信息即可:使用查看可安装版本:nvm list availableD:\GitRoot\SE\dmc\magic-boot>nvm list available | CURRENT | LTS | OLD STABLE | OLD UNSTABLE | |--------------|--------------|--------------|--------------| | 21.6.2 | 20.11.1 | 0.12.18 | 0.11.16 | | 21.6.1 | 20.11.0 | 0.12.17 | 0.11.15 | | 21.6.0 | 20.10.0 | 0.12.16 | 0.11.14 | | 21.5.0 | 20.9.0 | 0.12.15 | 0.11.13 | | 21.4.0 | 18.19.1 | 0.12.14 | 0.11.12 | | 21.3.0 | 18.19.0 | 0.12.13 | 0.11.11 | | 21.2.0 | 18.18.2 | 0.12.12 | 0.11.10 | | 21.1.0 | 18.18.1 | 0.12.11 | 0.11.9 | | 21.0.0 | 18.18.0 | 0.12.10 | 0.11.8 | | 20.8.1 | 18.17.1 | 0.12.9 | 0.11.7 | | 20.8.0 | 18.17.0 | 0.12.8 | 0.11.6 | | 20.7.0 | 18.16.1 | 0.12.7 | 0.11.5 | | 20.6.1 | 18.16.0 | 0.12.6 | 0.11.4 | | 20.6.0 | 18.15.0 | 0.12.5 | 0.11.3 | | 20.5.1 | 18.14.2 | 0.12.4 | 0.11.2 | | 20.5.0 | 18.14.1 | 0.12.3 | 0.11.1 | | 20.4.0 | 18.14.0 | 0.12.2 | 0.11.0 | | 20.3.1 | 18.13.0 | 0.12.1 | 0.9.12 | | 20.3.0 | 18.12.1 | 0.12.0 | 0.9.11 | | 20.2.0 | 18.12.0 | 0.10.48 | 0.9.10 | This is a partial list. For a complete list, visit https://nodejs.org/en/download/releases查看LTS的版本号nvm ls-remote --lts安装指定版本Node:nvm install 版本号D:\GitRoot\SE\dmc\magic-boot>nvm install 21 Downloading node.js version 21.6.2 (64-bit)... Extracting node and npm... Complete npm v10.2.4 installed successfully. Installation complete. If you want to use this version, type nvm use 21.6.2查看已安装版本:nvm listD:\GitRoot\SE\dmc\magic-boot>nvm list 21.6.2 * 20.10.0 (Currently using 64-bit executable) 更多使用方法可以输入 nvm --help 命令可查看:D:\GitRoot\SE\dmc\magic-boot>nvm --help Running version 1.1.12. Usage: nvm arch : Show if node is running in 32 or 64 bit mode. nvm current : Display active version. nvm debug : Check the NVM4W process for known problems (troubleshooter). nvm install <version> [arch] : The version can be a specific version, "latest" for the latest current version, or "lts" for the most recent LTS version. Optionally specify whether to install the 32 or 64 bit version (defaults to system arch). Set [arch] to "all" to install 32 AND 64 bit versions. Add --insecure to the end of this command to bypass SSL validation of the remote download server. nvm list [available] : List the node.js installations. Type "available" at the end to see what can be installed. Aliased as ls. nvm on : Enable node.js version management. nvm off : Disable node.js version management. nvm proxy [url] : Set a proxy to use for downloads. Leave [url] blank to see the current proxy. Set [url] to "none" to remove the proxy. nvm node_mirror [url] : Set the node mirror. Defaults to https://nodejs.org/dist/. Leave [url] blank to use default url. nvm npm_mirror [url] : Set the npm mirror. Defaults to https://github.com/npm/cli/archive/. Leave [url] blank to default url. nvm uninstall <version> : The version must be a specific version. nvm use [version] [arch] : Switch to use the specified version. Optionally use "latest", "lts", or "newest". "newest" is the latest installed version. Optionally specify 32/64bit architecture. nvm use <arch> will continue using the selected version, but switch to 32/64 bit mode. nvm root [path] : Set the directory where nvm should store different versions of node.js. If <path> is not set, the current root will be displayed. nvm [--]version : Displays the current running version of nvm for Windows. Aliased as v.
-
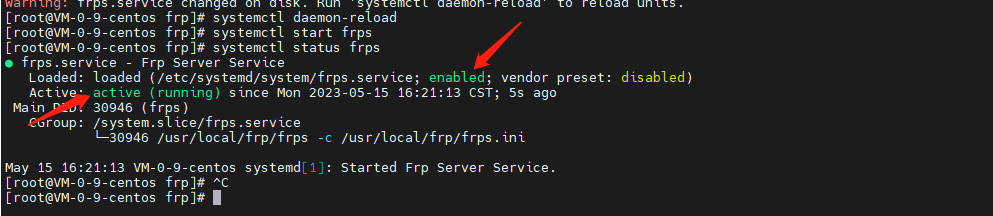
FRP服务端安装并设置开机自启动 背景介绍之前一直有使用FRP做内网穿透,一般主要用于远程桌面和对外提供http服务进行测试,由于域名备案信息被撤销,原有解析过去的二级域名被拦截了,所以考虑将FRP 服务端部署到一台墙外的服务器上去,搜了一圈没找到之前的部署记录,本次也就只好将安装过程记录备忘了。安装时间:2023-05-14 15:51安装下载最新版本的frpfrp 在GitHub的地址是,# 进入用户目录 cd /usr/local # 下载frp 最新版, wget https://github.com/fatedier/frp/releases/download/v0.48.0/frp_0.48.0_linux_amd64.tar.gz # 解压 tar -zxvf frp_0.48.0_linux_amd64.tar.gz配置打开服务端配置文件vi /usr/local/frp/frps.ini 参考frps_full.ini,将服务端配置文件(frps.ini)修改为如下内容[common] bind_addr = 0.0.0.0 bind_port = 7000 token = TOKEN_INFO # udp port to help make udp hole to penetrate nat bind_udp_port = 7001 # if you want to support virtual host, you must set the http port for listening (optional) # Note: http port and https port can be same with bind_port vhost_http_port = 80 vhost_https_port = 443 # console or real logFile path like ./frps.log log_file = ./frps.log # set dashboard_addr and dashboard_port to view dashboard of frps # dashboard_addr's default value is same with bind_addr # dashboard is available only if dashboard_port is set dashboard_addr = 0.0.0.0 dashboard_port = 7500 # dashboard user and passwd for basic auth protect dashboard_user = admin dashboard_pwd = admin # dashboard TLS mode dashboard_tls_mode = false # authentication_method specifies what authentication method to use authenticate frpc with frps. # If "token" is specified - token will be read into login message. # If "oidc" is specified - OIDC (Open ID Connect) token will be issued using OIDC settings. By default, this value is "token". authentication_method = token # if subdomain_host is not empty, you can set subdomain when type is http or https in frpc's configure file # when subdomain is test, the host used by routing is test.frps.com subdomain_host = lan.dev.trswcm.com自启动添加自启动文件vi /etc/systemd/system/frps.service输入如下内容:[Unit] Description=Frp Server Service After=network.target [Service] Type=simple User=root Restart=on-failure RestartSec=5s ExecStart=/usr/local/frp/frps -c /usr/local/frp/frps.ini [Install] WantedBy=multi-user.target添加可执行权限chmod +x /etc/systemd/system/frps.service注册服务systemctl enable frps.service当出现如下提示信息后表示注册成功 [root@VM-0-9-centos systemd]# systemctl enable frps.service Created symlink from /etc/systemd/system/multi-user.target.wants/frps.service to /etc/systemd/system/frps.service.启动服务systemctl daemon-reload systemctl start frps启动过程有可能会报错,报错的话,请根据错误提示进行相应调整查看服务状态systemctl status frps出现如下截图所示信息则表示已启动成功:推荐另一种简单的docker-compose 的方式:‵‵‵ yamlversion: '3.3'services:frps: restart: always network_mode: host volumes: - './frps.ini:/etc/frp/frps.ini' container_name: frps image: snowdreamtech/frps
-
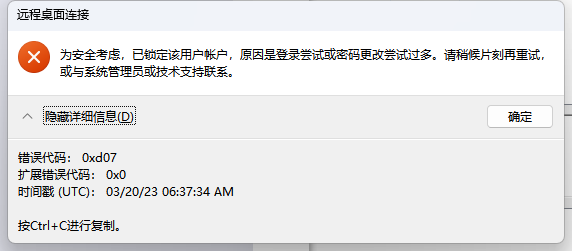
windows11 远程提示:为安全考虑,已锁定该用户帐户,原因是登录尝试或密码更改尝试过多。 现象使用windows 自带的远程桌面工具 mstsc 远程另一台主机时提示用户把账号信息已锁定:完整错误信息如下:[Window Title] 远程桌面连接 [Content] 为安全考虑,已锁定该用户帐户,原因是登录尝试或密码更改尝试过多。请稍候片刻再重试,或与系统管理员或技术支持联系。 [^] 隐藏详细信息(D) [确定] [Expanded Information] 错误代码: 0xd07 扩展错误代码: 0x0 时间戳 (UTC): 03/20/23 06:37:34 AM 按Ctrl+C进行复制。解决一、进入组策略命令行输入 gpedit.msc,在打开的 本地组策略编辑器中打开如下路径:计算机配置 —>Windows设置 —> 安全设置 —> 账户策略 —> 账户锁定策略,如下图所示:修改限制双击「帐户锁定阈值」策略,在打开的对话框中将值修改为 0,如下图所示:修改后,单击「确定」按钮保存即可。
-
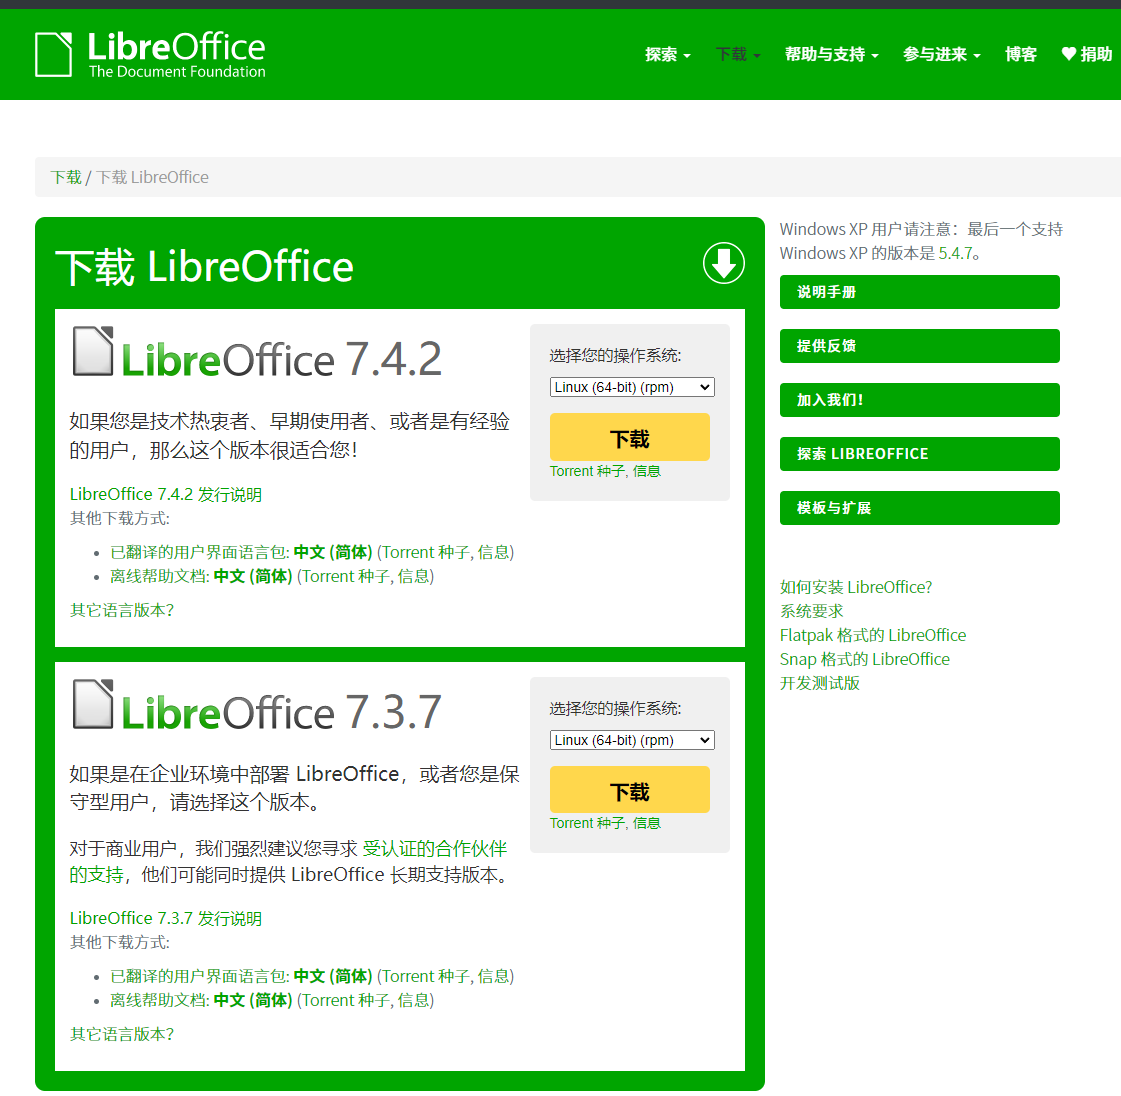
CentOS安装LibreOffice记录 LibreOffice安装下载地址:https://zh-cn.libreoffice.org/download/libreoffice/下载最新的Windows版本,目前最新文档版本是7.3.7。下载后正常安装即可。下载LibreOffice:# 下载主安装程序 wget https://mirrors.ustc.edu.cn/tdf/libreoffice/stable/7.3.7/rpm/x86_64/LibreOffice_7.3.7_Linux_x86-64_rpm.tar.gz # 下载中文字体支持包 wget https://mirrors.ustc.edu.cn/tdf/libreoffice/stable/7.3.7/rpm/x86_64/LibreOffice_7.3.7_Linux_x86-64_rpm_langpack_zh-CN.tar.gz解压tar -zxvf LibreOffice_7.3.7_Linux_x86-64_rpm.tar.gz安装# 进入安装目录 cd LibreOffice_7.3.7_Linux_x86-64_rpm/RPMS/ # 安装 yum localinstall -y *.rpm程序路径:/opt/libreoffice7.3/program/soffice启动nohup /opt/libreoffice7.3/program/soffice --headless --accept="socket,host=127.0.0.1,port=8100;urp;" --nofirststartwizard &
-
CentOS 安装 OpenOffice记录 项目有需要用到OpenOffice进行word文档解析,需在服务器部署OpenOffice,以下为安装记录。下载地址:https://www.openoffice.org/download/index.html当前最新版本是4.1.13。下载后正常安装即可。下载wget http://jaist.dl.sourceforge.net/project/openofficeorg.mirror/4.1.13/binaries/zh-CN/Apache_OpenOffice_4.1.13_Linux_x86-64_install-rpm_zh-CN.tar.gz解压tar -zxvf Apache_OpenOffice_4.1.13_Linux_x86-64_install-rpm_zh-CN.tar.gz安装cd zh-CN/RPMS/ rpm -ivh *.rpm 启动服务nohup /opt/openoffice4/program/soffice -headless -accept="socket,host=127.0.0.1,port=8100;urp;" -nofirststartwizard >/dev/null 2>&1 & 若启动过程中提示如下信息:no suitable windowing system found, exiting.。可执行如下代码安装缺失的依赖。yum groupinstall "X Window System"自启动将以上启动服务的代码添加到 /etc/rc.d/rc.local最底部,或自行参考Linux添加服务的方式实现自启动。
-
思源笔记docker私有化部署及使用体验分享 说明考虑到网络问题、数据隐私和安全性,很多人都无法放心将所有笔记保存在 Notion、Wolai 这类纯在线服务上,一旦服务变卦 (比如收费、倒闭等) 都会很被动。所以,如果有一款既拥有各种先进特性,还能自建服务器的开源笔记软件,那就非常完美了!而它就是思源笔记以下是思源笔记官网的介绍,着实让人心动:部署官网提供 Docker 方式,让私有化部署便捷了不少。只需要两条命令即可:# 拉取镜像 docker pull b3log/siyuan # docker 运行 docker run --name siyuan -it -d --restart=always -v /data/siyuan/workspace:/siyuan/workspace -p 6806:6806 -u $(id -u):$(id -g) b3log/siyuan --workspace=/siyuan/workspace或使用 docker-compose 方式部署:services: siyuannote: image: b3log/siyuan container_name: siyuannote privileged: true restart: always # 可修改下方的xxxxxx为自己的访问授权码 command: ['--workspace=/siyuan/workspace/', '--accessAuthCode=xxxxxx'] user: '1000:1000' ports: - 6806:6806 volumes: - ./data:/siyuan/workspace environment: # A list of time zone identifiers can be found at https://en.wikipedia.org/wiki/List_of_tz_database_time_zones - TZ=Asia/Shanghai注意: 镜像中是使用默认创建的普通用户 siyuan(uid 1000/gid 1000)来启动内核进程的,所以在宿主机创建工作空间文件夹时请注意设置该文件夹所属用户组:chown -R 1000:1000 ./data,命令行启动容器时需要带参数 -u 1000:1000。配置 nginx 对外提供服务我使用的腾讯云的服务器,将思源笔记使用docker 运行后,通常使用 nginx 代理对外提供应用服务。nginx 代理配置信息如下server { listen 80; server_name siyuannote.work.zhuzhilong.com; index index.html index.htm default.htm default.html; root /www/wwwroot/siyuannote.work.zhuzhilong.com; location / { proxy_pass http://10.0.12.15:6806; proxy_set_header Host $host; proxy_set_header X-Real-IP $remote_addr; proxy_set_header X-Forwarded-For $proxy_add_x_forwarded_for; proxy_set_header REMOTE-HOST $remote_addr; proxy_http_version 1.1; proxy_set_header Upgrade $http_upgrade; proxy_set_header Connection "Upgrade"; add_header X-Cache $upstream_cache_status; #Set Nginx Cache add_header Cache-Control no-cache; } access_log /www/wwwlogs/siyuannote.work.zhuzhilong.com.log; error_log /www/wwwlogs/siyuannote.work.zhuzhilong.com.error.log; }配制好后,重启 nginx 服务即可使用我们nginx配置的域名(siyuannote.work.zhuzhilong.com)访问了。初体验国际化初次访问的时候,默认是英文版的,可以按Alt + P,在打开的对话框中,选择 Appearance -> Language 中选择 简体中文:使用体验Block编辑思源笔记在使用体验上,较常规markdown编辑器,一大特色就是Block编辑模式,按下 /后可快速使用内置 20+ 种类型的块元素和 10+ 种行级元素。表格排版对于一些结构化的数据,难免会使用表格进行布局,而常规的markdown 在使用表格时异常难使用,思源笔记提供右键方式操作表格,也还算灵活:粘贴 Markdown初次使用的时候,直接把 markdown 内容在编辑器中Ctrl + V 粘贴,发现直接变成代码块了(2024-06-28更新:该问题已在试用的最新版本(版本号: v3.0.17)修复)。感觉有些不习惯,这一点语雀做得最好。在快捷键中查看了下 粘贴为纯文本方式 ,可以使用 Ctrl + Shift + V。从快捷键配置界面可以看出思源笔记的快捷键还是很丰富的,而且可以自定义。粘贴剪贴板中的图片经验证可直接粘贴剪贴板中的截图图片上传到服务器中,图片上传后持久化存储在服务器思源笔记工作目录的assets目录中。没有看到可以配置图床的地方。安全配置思源笔记部署后默认是不需要密码即可访问的,我们私有化部署更多的是要控制只有我们自己能访问。可在配置界面的 关于 -> 访问授权码 中 设置授权码 (2024-06-28更新:在试用的最新版本(版本号: v3.0.17)已改为在部署时指定访问授权码,界面中不再提供配置入口):配置后将只能输入授权码解锁后才可访问:功能扩展思源笔记提供「集市」模块,可在线下载主题、模板、图标、模板、挂件,初步使用感觉还是蛮方便的。插件机制给思源笔记扩展了无限可能,还有很多功能可以在后续的使用中逐步体验。尾声Typora 开启强制收费模式后,有短暂的使用过 Mark Text,但是发现 Mark Text 在打开较大 Markdown 文件时比较卡顿。偶然在公众号中看到推荐的思源笔记,通过官网了解后,便有了试用的冲动。使用下来,感觉可以作为后续的主力 Markdown 编辑器使用。Links官网:https://b3log.org/siyuan/思源笔记Docker镜像:https://hub.docker.com/r/b3log/siyuan
-
使用 Syncthing 同步文件 下载syncthingwget https://github.com/syncthing/syncthing/releases/download/v1.20.2/syncthing-linux-amd64-v1.20.2.tar.gz tar -zxvf syncthing-linux-amd64-v1.20.2.tar.gz本应用解压的路径为 /opt/syncthing-linux-amd64-v1.20.2。下面配置syncthing 自启动。配置自启动根据官方提供的说明(https://docs.syncthing.net/users/autostart.html)有两种方式.第1种为 Using Supervisord,这种还要安装 supervisor,并启动服务,稍显麻烦,这里我们直接采用系统服务的方式。1、拷贝自启动文件到服务目录cp /opt/syncthing-linux-amd64-v1.20.2/etc/linux-systemd/system/syncthing@.service /etc/systemd/system/syncthing@root.service2、修改自启动文件主要修改内容为ExecStart 的内容,修改后的内容示例如下:/opt/syncthing-linux-amd64-v1.20.2/syncthing serve --gui-address=172.17.0.11:8384 --no-restart --logflags=0 3、启用并启动服务systemctl enable syncthing@root.service systemctl start syncthing@root.service
-
-
CentOS安装ffmpeg 由于ZCMS在上传视频时会强制对视频进行转码,在网上找了些安装教程发现转码服务不能正常使用。经过跟产品负责人(才哥)沟通后得知,当前ZCMS只能适配FFmpeg 2.8.x版本。后根据提供的一键安装包安装后成功实现。ffmpeg2安装包.zip直接使用编译后的文件wget https://johnvansickle.com/ffmpeg/builds/ffmpeg-git-amd64-static.tar.xz xz -d ffmpeg-git-amd64-static.tar.xz tar -xvf ffmpeg-git-amd64-static.tar cd /usr/bin ln -s /app/ffmpeg-git-20211217-amd64-static/ffmpeg ln -s /soft/ffmpeg_in_docker/qt-faststart一键安装脚本(install_ffmpeg_centos7.sh)#! /bin/bash cur_dir=$(pwd) #target_ffmpeg_lib_dir=$cur_dir/lib #target_ffmpeg_inc_dir=$cur_dir/inc rm -rf ffmpeg-4.3.2* rm -rf nasm* rm -rf yasm* rm -rf x264* yum install git # 由于 asm版本是旧的或者没有asm,因此需要安装或者更新 echo " ===================== 开始安装yasm ===================== " wget http://www.tortall.net/projects/yasm/releases/yasm-1.3.0.tar.gz tar zxvf yasm-1.3.0.tar.gz cd yasm-1.3.0 ./configure make && make install echo " ===================== 开始安装nasm ===================== " wget https://www.nasm.us/pub/nasm/releasebuilds/2.14/nasm-2.14.tar.gz tar -zxvf nasm-2.14.tar.gz cd nasm-2.14 ./configure make -j60 make install echo " ===================== 开始安装x264 ===================== " git clone https://code.videolan.org/videolan/x264.git cd x264 ./configure --includedir=/usr/local/include --libdir=/usr/local/lib --enable-shared make -j60 make install echo " ===================== 开始安装ffmpeg ===================== " wget http://www.ffmpeg.org/releases/ffmpeg-4.3.2.tar.gz tar -zxvf ffmpeg-4.3.2.tar.gz cd ./ffmpeg-4.3.2 # ubuntu 必须添加 --enable-shared https://github.com/lutris/ffmpeg-nvenc/issues/5--prefix=/usr/local/src/ffmpeg ./configure --enable-shared --enable-swscale --enable-gpl --enable-nonfree --enable-pic --enable-version3 --enable-postproc --enable-pthreads --enable-static --enable-libx264 echo " ===================== 开始 make && make install ===================== " make -j60 make install echo "您还需要手动设置环境变量: export LD_LIBRARY_PATH=\$LD_LIBRARY_PATH:/usr/local/lib"参考链接:Docker方式安装FFmpegLinux 下ffmpeg的环境搭建与安装
-
CentOS7 Tomcat自启动 由于演示需要,需将Java应用部署到虚拟机的CentOS环境中,为便于演示,需虚拟机启动时自动启动我们的Java应用。有参考 ZVING-Tomcat安装 相关章节配置自启动,效果是OK的,但是不管怎么配置,重启后始终是以root账号启动,为安全考虑,需使用名为zving的普通权限账号启动应用。经过尝试后达到预期目的,特记录如下。Tomcat目录:/data/javaapps/app-hndcdemo/apache-tomcat-8.5.721、添加启动文件vi /etc/systemd/system/tomcatd.servicetomcatd.service文件内容如下:请根据需要调整tomcat的安装目录[Unit] Description=Tomcat8 for ZCMS Service After=network.target [Service] User=zving Group=zving Type=forking ExecStart=/data/javaapps/app-hndcdemo/apache-tomcat-8.5.72/bin/startup.sh ExecStop=/data/javaapps/app-hndcdemo/apache-tomcat-8.5.72/bin/shutdown.sh PrivateTmp=true [Install] WantedBy=multi-user.target2、添加可执行权限chmod 755 /etc/systemd/system/tomcatd.service3、设置开机自启动systemctl enable tomcatd.service
-
CentOS安装LibreOffice 由于应用需要将Office文件转义,经调研后,选择基于LibreOffice作为转译工具。现记录LibreOffice在CentOS上的安装过程。下载可以从LibreOffice官网使用最新的版本下载,官网下载地址为:https://zh-cn.libreoffice.org/download/libreoffice/wget --no-check-certificate https://download.documentfoundation.org/libreoffice/stable/7.3.0/rpm/x86_64/LibreOffice_7.3.0_Linux_x86-64_rpm.tar.gz执行记录如下:[root@VM-12-15-centos soft]# wget --no-check-certificate https://download.documentfoundation.org/libreoffice/stable/7.3.0/rpm/x86_64/LibreOffice_7.3.0_Linux_x86-64_rpm.tar.gz --2022-02-05 10:28:41-- https://download.documentfoundation.org/libreoffice/stable/7.3.0/rpm/x86_64/LibreOffice_7.3.0_Linux_x86-64_rpm.tar.gz Resolving download.documentfoundation.org (download.documentfoundation.org)... 89.238.68.185, 2a00:1828:a012:185::1 Connecting to download.documentfoundation.org (download.documentfoundation.org)|89.238.68.185|:443... connected. WARNING: cannot verify download.documentfoundation.org's certificate, issued by ‘/C=US/O=Let's Encrypt/CN=R3’: Issued certificate has expired. HTTP request sent, awaiting response... 302 Found Location: https://mirrors.nju.edu.cn/tdf/libreoffice/stable/7.3.0/rpm/x86_64/LibreOffice_7.3.0_Linux_x86-64_rpm.tar.gz [following] --2022-02-05 10:28:43-- https://mirrors.nju.edu.cn/tdf/libreoffice/stable/7.3.0/rpm/x86_64/LibreOffice_7.3.0_Linux_x86-64_rpm.tar.gz Resolving mirrors.nju.edu.cn (mirrors.nju.edu.cn)... 210.28.130.3, 2001:da8:1007:4011::3 Connecting to mirrors.nju.edu.cn (mirrors.nju.edu.cn)|210.28.130.3|:443... connected. HTTP request sent, awaiting response... 200 OK Length: 269246349 (257M) [application/octet-stream] Saving to: ‘LibreOffice_7.3.0_Linux_x86-64_rpm.tar.gz’ 100%[============================>] 269,246,349 11.4MB/s in 21s 2022-02-05 10:29:04 (12.2 MB/s) - ‘LibreOffice_7.3.0_Linux_x86-64_rpm.tar.gz’ saved [269246349/269246349] [root@VM-12-15-centos soft]#安装LibreOffice解压主程序tar -zxvf LibreOffice_7.3.0_Linux_x86-64_rpm.tar.gz执行记录如下:[root@VM-12-15-centos soft]# tar -zxvf LibreOffice_7.3.0_Linux_x86-64_rpm.tar.gz LibreOffice_7.3.0.3_Linux_x86-64_rpm/ LibreOffice_7.3.0.3_Linux_x86-64_rpm/RPMS/ LibreOffice_7.3.0.3_Linux_x86-64_rpm/RPMS/libreoffice7.3-math-7.3.0.3-3.x86_64.rpm LibreOffice_7.3.0.3_Linux_x86-64_rpm/RPMS/libobasis7.3-writer-7.3.0.3-3.x86_64.rpm LibreOffice_7.3.0.3_Linux_x86-64_rpm/RPMS/libreoffice7.3-dict-fr-7.3.0.3-3.x86_64.rpm LibreOffice_7.3.0.3_Linux_x86-64_rpm/RPMS/libobasis7.3-firebird-7.3.0.3-3.x86_64.rpm LibreOffice_7.3.0.3_Linux_x86-64_rpm/RPMS/libobasis7.3-extension-javascript-script-provider-7.3.0.3-3.x86_64.rpm LibreOffice_7.3.0.3_Linux_x86-64_rpm/RPMS/libobasis7.3-draw-7.3.0.3-3.x86_64.rpm LibreOffice_7.3.0.3_Linux_x86-64_rpm/RPMS/libobasis7.3-pyuno-7.3.0.3-3.x86_64.rpm LibreOffice_7.3.0.3_Linux_x86-64_rpm/RPMS/libobasis7.3-en-US-7.3.0.3-3.x86_64.rpm LibreOffice_7.3.0.3_Linux_x86-64_rpm/RPMS/libobasis7.3-librelogo-7.3.0.3-3.x86_64.rpm LibreOffice_7.3.0.3_Linux_x86-64_rpm/RPMS/libobasis7.3-ooolinguistic-7.3.0.3-3.x86_64.rpm LibreOffice_7.3.0.3_Linux_x86-64_rpm/RPMS/libobasis7.3-extension-beanshell-script-provider-7.3.0.3-3.x86_64.rpm LibreOffice_7.3.0.3_Linux_x86-64_rpm/RPMS/libobasis7.3-onlineupdate-7.3.0.3-3.x86_64.rpm LibreOffice_7.3.0.3_Linux_x86-64_rpm/RPMS/libobasis7.3-gnome-integration-7.3.0.3-3.x86_64.rpm LibreOffice_7.3.0.3_Linux_x86-64_rpm/RPMS/libreoffice7.3-ure-7.3.0.3-3.x86_64.rpm LibreOffice_7.3.0.3_Linux_x86-64_rpm/RPMS/libobasis7.3-impress-7.3.0.3-3.x86_64.rpm LibreOffice_7.3.0.3_Linux_x86-64_rpm/RPMS/libreoffice7.3-7.3.0.3-3.x86_64.rpm LibreOffice_7.3.0.3_Linux_x86-64_rpm/RPMS/libobasis7.3-extension-mediawiki-publisher-7.3.0.3-3.x86_64.rpm LibreOffice_7.3.0.3_Linux_x86-64_rpm/RPMS/libreoffice7.3-draw-7.3.0.3-3.x86_64.rpm LibreOffice_7.3.0.3_Linux_x86-64_rpm/RPMS/libobasis7.3-math-7.3.0.3-3.x86_64.rpm LibreOffice_7.3.0.3_Linux_x86-64_rpm/RPMS/libreoffice7.3-freedesktop-menus-7.3.0-3.noarch.rpm LibreOffice_7.3.0.3_Linux_x86-64_rpm/RPMS/libobasis7.3-postgresql-sdbc-7.3.0.3-3.x86_64.rpm LibreOffice_7.3.0.3_Linux_x86-64_rpm/RPMS/libreoffice7.3-impress-7.3.0.3-3.x86_64.rpm LibreOffice_7.3.0.3_Linux_x86-64_rpm/RPMS/libobasis7.3-python-script-provider-7.3.0.3-3.x86_64.rpm LibreOffice_7.3.0.3_Linux_x86-64_rpm/RPMS/libobasis7.3-calc-7.3.0.3-3.x86_64.rpm LibreOffice_7.3.0.3_Linux_x86-64_rpm/RPMS/libobasis7.3-base-7.3.0.3-3.x86_64.rpm LibreOffice_7.3.0.3_Linux_x86-64_rpm/RPMS/libreoffice7.3-dict-es-7.3.0.3-3.x86_64.rpm LibreOffice_7.3.0.3_Linux_x86-64_rpm/RPMS/libobasis7.3-extension-nlpsolver-7.3.0.3-3.x86_64.rpm LibreOffice_7.3.0.3_Linux_x86-64_rpm/RPMS/libobasis7.3-kde-integration-7.3.0.3-3.x86_64.rpm LibreOffice_7.3.0.3_Linux_x86-64_rpm/RPMS/libobasis7.3-ogltrans-7.3.0.3-3.x86_64.rpm LibreOffice_7.3.0.3_Linux_x86-64_rpm/RPMS/libreoffice7.3-en-US-7.3.0.3-3.x86_64.rpm LibreOffice_7.3.0.3_Linux_x86-64_rpm/RPMS/libreoffice7.3-base-7.3.0.3-3.x86_64.rpm LibreOffice_7.3.0.3_Linux_x86-64_rpm/RPMS/libreoffice7.3-writer-7.3.0.3-3.x86_64.rpm LibreOffice_7.3.0.3_Linux_x86-64_rpm/RPMS/libobasis7.3-extension-pdf-import-7.3.0.3-3.x86_64.rpm LibreOffice_7.3.0.3_Linux_x86-64_rpm/RPMS/libreoffice7.3-dict-en-7.3.0.3-3.x86_64.rpm LibreOffice_7.3.0.3_Linux_x86-64_rpm/RPMS/libobasis7.3-core-7.3.0.3-3.x86_64.rpm LibreOffice_7.3.0.3_Linux_x86-64_rpm/RPMS/libobasis7.3-images-7.3.0.3-3.x86_64.rpm LibreOffice_7.3.0.3_Linux_x86-64_rpm/RPMS/libreoffice7.3-calc-7.3.0.3-3.x86_64.rpm LibreOffice_7.3.0.3_Linux_x86-64_rpm/RPMS/libobasis7.3-graphicfilter-7.3.0.3-3.x86_64.rpm LibreOffice_7.3.0.3_Linux_x86-64_rpm/RPMS/libobasis7.3-libreofficekit-data-7.3.0.3-3.x86_64.rpm LibreOffice_7.3.0.3_Linux_x86-64_rpm/RPMS/libobasis7.3-xsltfilter-7.3.0.3-3.x86_64.rpm LibreOffice_7.3.0.3_Linux_x86-64_rpm/RPMS/libobasis7.3-ooofonts-7.3.0.3-3.x86_64.rpm LibreOffice_7.3.0.3_Linux_x86-64_rpm/RPMS/libobasis7.3-extension-report-builder-7.3.0.3-3.x86_64.rpm LibreOffice_7.3.0.3_Linux_x86-64_rpm/install LibreOffice_7.3.0.3_Linux_x86-64_rpm/readmes/ LibreOffice_7.3.0.3_Linux_x86-64_rpm/readmes/README_en-US [root@VM-12-15-centos soft]# 进入安装目录cd LibreOffice_7.3.0.3_Linux_x86-64_rpm/RPMS/执行安装yum install *.rpm执行记录如下:[root@VM-12-15-centos RPMS]# yum install *.rpm Loaded plugins: fastestmirror, langpacks Repository epel is listed more than once in the configuration Examining libobasis7.3-base-7.3.0.3-3.x86_64.rpm: libobasis7.3-base-7.3.0.3-3.x86_64 Marking libobasis7.3-base-7.3.0.3-3.x86_64.rpm to be installed Examining libobasis7.3-calc-7.3.0.3-3.x86_64.rpm: libobasis7.3-calc-7.3.0.3-3.x86_64 Marking libobasis7.3-calc-7.3.0.3-3.x86_64.rpm to be installed Examining libobasis7.3-core-7.3.0.3-3.x86_64.rpm: libobasis7.3-core-7.3.0.3-3.x86_64 Marking libobasis7.3-core-7.3.0.3-3.x86_64.rpm to be installed Examining libobasis7.3-draw-7.3.0.3-3.x86_64.rpm: libobasis7.3-draw-7.3.0.3-3.x86_64 Marking libobasis7.3-draw-7.3.0.3-3.x86_64.rpm to be installed Examining libobasis7.3-en-US-7.3.0.3-3.x86_64.rpm: libobasis7.3-en-US-7.3.0.3-3.x86_64 Marking libobasis7.3-en-US-7.3.0.3-3.x86_64.rpm to be installed Examining libobasis7.3-extension-beanshell-script-provider-7.3.0.3-3.x86_64.rpm: libobasis7.3-extension-beanshell-script-provider-7.3.0.3-3.x86_64 Marking libobasis7.3-extension-beanshell-script-provider-7.3.0.3-3.x86_64.rpm to be installed Examining libobasis7.3-extension-javascript-script-provider-7.3.0.3-3.x86_64.rpm: libobasis7.3-extension-javascript-script-provider-7.3.0.3-3.x86_64 Marking libobasis7.3-extension-javascript-script-provider-7.3.0.3-3.x86_64.rpm to be installed Examining libobasis7.3-extension-mediawiki-publisher-7.3.0.3-3.x86_64.rpm: libobasis7.3-extension-mediawiki-publisher-7.3.0.3-3.x86_64 Marking libobasis7.3-extension-mediawiki-publisher-7.3.0.3-3.x86_64.rpm to be installed Examining libobasis7.3-extension-nlpsolver-7.3.0.3-3.x86_64.rpm: libobasis7.3-extension-nlpsolver-7.3.0.3-3.x86_64 Marking libobasis7.3-extension-nlpsolver-7.3.0.3-3.x86_64.rpm to be installed Examining libobasis7.3-extension-pdf-import-7.3.0.3-3.x86_64.rpm: libobasis7.3-extension-pdf-import-7.3.0.3-3.x86_64 Marking libobasis7.3-extension-pdf-import-7.3.0.3-3.x86_64.rpm to be installed Examining libobasis7.3-extension-report-builder-7.3.0.3-3.x86_64.rpm: libobasis7.3-extension-report-builder-7.3.0.3-3.x86_64 Marking libobasis7.3-extension-report-builder-7.3.0.3-3.x86_64.rpm to be installed Examining libobasis7.3-firebird-7.3.0.3-3.x86_64.rpm: libobasis7.3-firebird-7.3.0.3-3.x86_64 Marking libobasis7.3-firebird-7.3.0.3-3.x86_64.rpm to be installed Examining libobasis7.3-gnome-integration-7.3.0.3-3.x86_64.rpm: libobasis7.3-gnome-integration-7.3.0.3-3.x86_64 Marking libobasis7.3-gnome-integration-7.3.0.3-3.x86_64.rpm to be installed Examining libobasis7.3-graphicfilter-7.3.0.3-3.x86_64.rpm: libobasis7.3-graphicfilter-7.3.0.3-3.x86_64 Marking libobasis7.3-graphicfilter-7.3.0.3-3.x86_64.rpm to be installed Examining libobasis7.3-images-7.3.0.3-3.x86_64.rpm: libobasis7.3-images-7.3.0.3-3.x86_64 Marking libobasis7.3-images-7.3.0.3-3.x86_64.rpm to be installed Examining libobasis7.3-impress-7.3.0.3-3.x86_64.rpm: libobasis7.3-impress-7.3.0.3-3.x86_64 Marking libobasis7.3-impress-7.3.0.3-3.x86_64.rpm to be installed Examining libobasis7.3-kde-integration-7.3.0.3-3.x86_64.rpm: libobasis7.3-kde-integration-7.3.0.3-3.x86_64 Marking libobasis7.3-kde-integration-7.3.0.3-3.x86_64.rpm to be installed Examining libobasis7.3-librelogo-7.3.0.3-3.x86_64.rpm: libobasis7.3-librelogo-7.3.0.3-3.x86_64 Marking libobasis7.3-librelogo-7.3.0.3-3.x86_64.rpm to be installed Examining libobasis7.3-libreofficekit-data-7.3.0.3-3.x86_64.rpm: libobasis7.3-libreofficekit-data-7.3.0.3-3.x86_64 Marking libobasis7.3-libreofficekit-data-7.3.0.3-3.x86_64.rpm to be installed Examining libobasis7.3-math-7.3.0.3-3.x86_64.rpm: libobasis7.3-math-7.3.0.3-3.x86_64 Marking libobasis7.3-math-7.3.0.3-3.x86_64.rpm to be installed Examining libobasis7.3-ogltrans-7.3.0.3-3.x86_64.rpm: libobasis7.3-ogltrans-7.3.0.3-3.x86_64 Marking libobasis7.3-ogltrans-7.3.0.3-3.x86_64.rpm to be installed Examining libobasis7.3-onlineupdate-7.3.0.3-3.x86_64.rpm: libobasis7.3-onlineupdate-7.3.0.3-3.x86_64 Marking libobasis7.3-onlineupdate-7.3.0.3-3.x86_64.rpm to be installed Examining libobasis7.3-ooofonts-7.3.0.3-3.x86_64.rpm: libobasis7.3-ooofonts-7.3.0.3-3.x86_64 Marking libobasis7.3-ooofonts-7.3.0.3-3.x86_64.rpm to be installed Examining libobasis7.3-ooolinguistic-7.3.0.3-3.x86_64.rpm: libobasis7.3-ooolinguistic-7.3.0.3-3.x86_64 Marking libobasis7.3-ooolinguistic-7.3.0.3-3.x86_64.rpm to be installed Examining libobasis7.3-postgresql-sdbc-7.3.0.3-3.x86_64.rpm: libobasis7.3-postgresql-sdbc-7.3.0.3-3.x86_64 Marking libobasis7.3-postgresql-sdbc-7.3.0.3-3.x86_64.rpm to be installed Examining libobasis7.3-python-script-provider-7.3.0.3-3.x86_64.rpm: libobasis7.3-python-script-provider-7.3.0.3-3.x86_64 Marking libobasis7.3-python-script-provider-7.3.0.3-3.x86_64.rpm to be installed Examining libobasis7.3-pyuno-7.3.0.3-3.x86_64.rpm: libobasis7.3-pyuno-7.3.0.3-3.x86_64 Marking libobasis7.3-pyuno-7.3.0.3-3.x86_64.rpm to be installed Examining libobasis7.3-writer-7.3.0.3-3.x86_64.rpm: libobasis7.3-writer-7.3.0.3-3.x86_64 Marking libobasis7.3-writer-7.3.0.3-3.x86_64.rpm to be installed Examining libobasis7.3-xsltfilter-7.3.0.3-3.x86_64.rpm: libobasis7.3-xsltfilter-7.3.0.3-3.x86_64 Marking libobasis7.3-xsltfilter-7.3.0.3-3.x86_64.rpm to be installed Examining libreoffice7.3-7.3.0.3-3.x86_64.rpm: libreoffice7.3-7.3.0.3-3.x86_64 Marking libreoffice7.3-7.3.0.3-3.x86_64.rpm to be installed Examining libreoffice7.3-base-7.3.0.3-3.x86_64.rpm: libreoffice7.3-base-7.3.0.3-3.x86_64 Marking libreoffice7.3-base-7.3.0.3-3.x86_64.rpm to be installed Examining libreoffice7.3-calc-7.3.0.3-3.x86_64.rpm: libreoffice7.3-calc-7.3.0.3-3.x86_64 Marking libreoffice7.3-calc-7.3.0.3-3.x86_64.rpm to be installed Examining libreoffice7.3-dict-en-7.3.0.3-3.x86_64.rpm: libreoffice7.3-dict-en-7.3.0.3-3.x86_64 Marking libreoffice7.3-dict-en-7.3.0.3-3.x86_64.rpm to be installed Examining libreoffice7.3-dict-es-7.3.0.3-3.x86_64.rpm: libreoffice7.3-dict-es-7.3.0.3-3.x86_64 Marking libreoffice7.3-dict-es-7.3.0.3-3.x86_64.rpm to be installed Examining libreoffice7.3-dict-fr-7.3.0.3-3.x86_64.rpm: libreoffice7.3-dict-fr-7.3.0.3-3.x86_64 Marking libreoffice7.3-dict-fr-7.3.0.3-3.x86_64.rpm to be installed Examining libreoffice7.3-draw-7.3.0.3-3.x86_64.rpm: libreoffice7.3-draw-7.3.0.3-3.x86_64 Marking libreoffice7.3-draw-7.3.0.3-3.x86_64.rpm to be installed Examining libreoffice7.3-en-US-7.3.0.3-3.x86_64.rpm: libreoffice7.3-en-US-7.3.0.3-3.x86_64 Marking libreoffice7.3-en-US-7.3.0.3-3.x86_64.rpm to be installed Examining libreoffice7.3-freedesktop-menus-7.3.0-3.noarch.rpm: libreoffice7.3-freedesktop-menus-7.3.0-3.noarch Marking libreoffice7.3-freedesktop-menus-7.3.0-3.noarch.rpm to be installed Examining libreoffice7.3-impress-7.3.0.3-3.x86_64.rpm: libreoffice7.3-impress-7.3.0.3-3.x86_64 Marking libreoffice7.3-impress-7.3.0.3-3.x86_64.rpm to be installed Examining libreoffice7.3-math-7.3.0.3-3.x86_64.rpm: libreoffice7.3-math-7.3.0.3-3.x86_64 Marking libreoffice7.3-math-7.3.0.3-3.x86_64.rpm to be installed Examining libreoffice7.3-ure-7.3.0.3-3.x86_64.rpm: libreoffice7.3-ure-7.3.0.3-3.x86_64 Marking libreoffice7.3-ure-7.3.0.3-3.x86_64.rpm to be installed Examining libreoffice7.3-writer-7.3.0.3-3.x86_64.rpm: libreoffice7.3-writer-7.3.0.3-3.x86_64 Marking libreoffice7.3-writer-7.3.0.3-3.x86_64.rpm to be installed Resolving Dependencies --> Running transaction check ---> Package libobasis7.3-base.x86_64 0:7.3.0.3-3 will be installed ---> Package libobasis7.3-calc.x86_64 0:7.3.0.3-3 will be installed ---> Package libobasis7.3-core.x86_64 0:7.3.0.3-3 will be installed ---> Package libobasis7.3-draw.x86_64 0:7.3.0.3-3 will be installed ---> Package libobasis7.3-en-US.x86_64 0:7.3.0.3-3 will be installed ---> Package libobasis7.3-extension-beanshell-script-provider.x86_64 0:7.3.0.3-3 will be installed ---> Package libobasis7.3-extension-javascript-script-provider.x86_64 0:7.3.0.3-3 will be installed ---> Package libobasis7.3-extension-mediawiki-publisher.x86_64 0:7.3.0.3-3 will be installed ---> Package libobasis7.3-extension-nlpsolver.x86_64 0:7.3.0.3-3 will be installed ---> Package libobasis7.3-extension-pdf-import.x86_64 0:7.3.0.3-3 will be installed ---> Package libobasis7.3-extension-report-builder.x86_64 0:7.3.0.3-3 will be installed ---> Package libobasis7.3-firebird.x86_64 0:7.3.0.3-3 will be installed ---> Package libobasis7.3-gnome-integration.x86_64 0:7.3.0.3-3 will be installed ---> Package libobasis7.3-graphicfilter.x86_64 0:7.3.0.3-3 will be installed ---> Package libobasis7.3-images.x86_64 0:7.3.0.3-3 will be installed ---> Package libobasis7.3-impress.x86_64 0:7.3.0.3-3 will be installed ---> Package libobasis7.3-kde-integration.x86_64 0:7.3.0.3-3 will be installed ---> Package libobasis7.3-librelogo.x86_64 0:7.3.0.3-3 will be installed ---> Package libobasis7.3-libreofficekit-data.x86_64 0:7.3.0.3-3 will be installed ---> Package libobasis7.3-math.x86_64 0:7.3.0.3-3 will be installed ---> Package libobasis7.3-ogltrans.x86_64 0:7.3.0.3-3 will be installed ---> Package libobasis7.3-onlineupdate.x86_64 0:7.3.0.3-3 will be installed ---> Package libobasis7.3-ooofonts.x86_64 0:7.3.0.3-3 will be installed ---> Package libobasis7.3-ooolinguistic.x86_64 0:7.3.0.3-3 will be installed ---> Package libobasis7.3-postgresql-sdbc.x86_64 0:7.3.0.3-3 will be installed ---> Package libobasis7.3-python-script-provider.x86_64 0:7.3.0.3-3 will be installed ---> Package libobasis7.3-pyuno.x86_64 0:7.3.0.3-3 will be installed ---> Package libobasis7.3-writer.x86_64 0:7.3.0.3-3 will be installed ---> Package libobasis7.3-xsltfilter.x86_64 0:7.3.0.3-3 will be installed ---> Package libreoffice7.3.x86_64 0:7.3.0.3-3 will be installed ---> Package libreoffice7.3-base.x86_64 0:7.3.0.3-3 will be installed ---> Package libreoffice7.3-calc.x86_64 0:7.3.0.3-3 will be installed ---> Package libreoffice7.3-dict-en.x86_64 0:7.3.0.3-3 will be installed ---> Package libreoffice7.3-dict-es.x86_64 0:7.3.0.3-3 will be installed ---> Package libreoffice7.3-dict-fr.x86_64 0:7.3.0.3-3 will be installed ---> Package libreoffice7.3-draw.x86_64 0:7.3.0.3-3 will be installed ---> Package libreoffice7.3-en-US.x86_64 0:7.3.0.3-3 will be installed ---> Package libreoffice7.3-freedesktop-menus.noarch 0:7.3.0-3 will be installed ---> Package libreoffice7.3-impress.x86_64 0:7.3.0.3-3 will be installed ---> Package libreoffice7.3-math.x86_64 0:7.3.0.3-3 will be installed ---> Package libreoffice7.3-ure.x86_64 0:7.3.0.3-3 will be installed ---> Package libreoffice7.3-writer.x86_64 0:7.3.0.3-3 will be installed --> Finished Dependency Resolution Dependencies Resolved ========================================================================================================================= Package Arch Version Repository Size ========================================================================================================================= Installing: libobasis7.3-base x86_64 7.3.0.3-3 /libobasis7.3-base-7.3.0.3-3.x86_64 4.2 M libobasis7.3-calc x86_64 7.3.0.3-3 /libobasis7.3-calc-7.3.0.3-3.x86_64 22 M libobasis7.3-core x86_64 7.3.0.3-3 /libobasis7.3-core-7.3.0.3-3.x86_64 267 M libobasis7.3-draw x86_64 7.3.0.3-3 /libobasis7.3-draw-7.3.0.3-3.x86_64 49 k libobasis7.3-en-US x86_64 7.3.0.3-3 /libobasis7.3-en-US-7.3.0.3-3.x86_64 146 k libobasis7.3-extension-beanshell-script-provider x86_64 7.3.0.3-3 /libobasis7.3-extension-beanshell-script-provider-7.3.0.3-3.x86_64 414 k libobasis7.3-extension-javascript-script-provider x86_64 7.3.0.3-3 /libobasis7.3-extension-javascript-script-provider-7.3.0.3-3.x86_64 656 k libobasis7.3-extension-mediawiki-publisher x86_64 7.3.0.3-3 /libobasis7.3-extension-mediawiki-publisher-7.3.0.3-3.x86_64 4.4 M libobasis7.3-extension-nlpsolver x86_64 7.3.0.3-3 /libobasis7.3-extension-nlpsolver-7.3.0.3-3.x86_64 2.2 M libobasis7.3-extension-pdf-import x86_64 7.3.0.3-3 /libobasis7.3-extension-pdf-import-7.3.0.3-3.x86_64 15 M libobasis7.3-extension-report-builder x86_64 7.3.0.3-3 /libobasis7.3-extension-report-builder-7.3.0.3-3.x86_64 5.4 M libobasis7.3-firebird x86_64 7.3.0.3-3 /libobasis7.3-firebird-7.3.0.3-3.x86_64 11 M libobasis7.3-gnome-integration x86_64 7.3.0.3-3 /libobasis7.3-gnome-integration-7.3.0.3-3.x86_64 2.7 M libobasis7.3-graphicfilter x86_64 7.3.0.3-3 /libobasis7.3-graphicfilter-7.3.0.3-3.x86_64 3.6 M libobasis7.3-images x86_64 7.3.0.3-3 /libobasis7.3-images-7.3.0.3-3.x86_64 60 M libobasis7.3-impress x86_64 7.3.0.3-3 /libobasis7.3-impress-7.3.0.3-3.x86_64 2.1 M libobasis7.3-kde-integration x86_64 7.3.0.3-3 /libobasis7.3-kde-integration-7.3.0.3-3.x86_64 5.9 M libobasis7.3-librelogo x86_64 7.3.0.3-3 /libobasis7.3-librelogo-7.3.0.3-3.x86_64 773 k libobasis7.3-libreofficekit-data x86_64 7.3.0.3-3 /libobasis7.3-libreofficekit-data-7.3.0.3-3.x86_64 1.4 k libobasis7.3-math x86_64 7.3.0.3-3 /libobasis7.3-math-7.3.0.3-3.x86_64 1.9 M libobasis7.3-ogltrans x86_64 7.3.0.3-3 /libobasis7.3-ogltrans-7.3.0.3-3.x86_64 410 k libobasis7.3-onlineupdate x86_64 7.3.0.3-3 /libobasis7.3-onlineupdate-7.3.0.3-3.x86_64 484 k libobasis7.3-ooofonts x86_64 7.3.0.3-3 /libobasis7.3-ooofonts-7.3.0.3-3.x86_64 69 M libobasis7.3-ooolinguistic x86_64 7.3.0.3-3 /libobasis7.3-ooolinguistic-7.3.0.3-3.x86_64 1.4 k libobasis7.3-postgresql-sdbc x86_64 7.3.0.3-3 /libobasis7.3-postgresql-sdbc-7.3.0.3-3.x86_64 4.5 M libobasis7.3-python-script-provider x86_64 7.3.0.3-3 /libobasis7.3-python-script-provider-7.3.0.3-3.x86_64 43 k libobasis7.3-pyuno x86_64 7.3.0.3-3 /libobasis7.3-pyuno-7.3.0.3-3.x86_64 29 M libobasis7.3-writer x86_64 7.3.0.3-3 /libobasis7.3-writer-7.3.0.3-3.x86_64 12 M libobasis7.3-xsltfilter x86_64 7.3.0.3-3 /libobasis7.3-xsltfilter-7.3.0.3-3.x86_64 4.3 M libreoffice7.3 x86_64 7.3.0.3-3 /libreoffice7.3-7.3.0.3-3.x86_64 3.4 M libreoffice7.3-base x86_64 7.3.0.3-3 /libreoffice7.3-base-7.3.0.3-3.x86_64 63 libreoffice7.3-calc x86_64 7.3.0.3-3 /libreoffice7.3-calc-7.3.0.3-3.x86_64 63 libreoffice7.3-dict-en x86_64 7.3.0.3-3 /libreoffice7.3-dict-en-7.3.0.3-3.x86_64 25 M libreoffice7.3-dict-es x86_64 7.3.0.3-3 /libreoffice7.3-dict-es-7.3.0.3-3.x86_64 23 M libreoffice7.3-dict-fr x86_64 7.3.0.3-3 /libreoffice7.3-dict-fr-7.3.0.3-3.x86_64 6.5 M libreoffice7.3-draw x86_64 7.3.0.3-3 /libreoffice7.3-draw-7.3.0.3-3.x86_64 63 libreoffice7.3-en-US x86_64 7.3.0.3-3 /libreoffice7.3-en-US-7.3.0.3-3.x86_64 16 k libreoffice7.3-freedesktop-menus noarch 7.3.0-3 /libreoffice7.3-freedesktop-menus-7.3.0-3.noarch 1.4 M libreoffice7.3-impress x86_64 7.3.0.3-3 /libreoffice7.3-impress-7.3.0.3-3.x86_64 66 libreoffice7.3-math x86_64 7.3.0.3-3 /libreoffice7.3-math-7.3.0.3-3.x86_64 63 libreoffice7.3-ure x86_64 7.3.0.3-3 /libreoffice7.3-ure-7.3.0.3-3.x86_64 42 M libreoffice7.3-writer x86_64 7.3.0.3-3 /libreoffice7.3-writer-7.3.0.3-3.x86_64 65 Transaction Summary ========================================================================================================================= Install 42 Packages Total size: 630 M Installed size: 630 M Is this ok [y/d/N]: y Downloading packages: Running transaction check Running transaction test Transaction test succeeded Running transaction Installing : libreoffice7.3-ure-7.3.0.3-3.x86_64 1/42 Installing : libobasis7.3-ooofonts-7.3.0.3-3.x86_64 2/42 Installing : libobasis7.3-core-7.3.0.3-3.x86_64 3/42 Installing : libobasis7.3-base-7.3.0.3-3.x86_64 4/42 Installing : libobasis7.3-writer-7.3.0.3-3.x86_64 5/42 Installing : libobasis7.3-impress-7.3.0.3-3.x86_64 6/42 Installing : libobasis7.3-draw-7.3.0.3-3.x86_64 7/42 Installing : libobasis7.3-images-7.3.0.3-3.x86_64 8/42 Installing : libreoffice7.3-7.3.0.3-3.x86_64 9/42 Installing : libobasis7.3-math-7.3.0.3-3.x86_64 10/42 Installing : libobasis7.3-en-US-7.3.0.3-3.x86_64 11/42 Installing : libobasis7.3-pyuno-7.3.0.3-3.x86_64 12/42 Installing : libobasis7.3-calc-7.3.0.3-3.x86_64 13/42 Installing : libreoffice7.3-calc-7.3.0.3-3.x86_64 14/42 Installing : libobasis7.3-librelogo-7.3.0.3-3.x86_64 15/42 Installing : libreoffice7.3-en-US-7.3.0.3-3.x86_64 16/42 Installing : libreoffice7.3-math-7.3.0.3-3.x86_64 17/42 Installing : libreoffice7.3-dict-en-7.3.0.3-3.x86_64 18/42 Installing : libreoffice7.3-base-7.3.0.3-3.x86_64 19/42 Installing : libreoffice7.3-dict-es-7.3.0.3-3.x86_64 20/42 Installing : libreoffice7.3-dict-fr-7.3.0.3-3.x86_64 21/42 Installing : libreoffice7.3-writer-7.3.0.3-3.x86_64 22/42 Installing : libreoffice7.3-draw-7.3.0.3-3.x86_64 23/42 Installing : libreoffice7.3-impress-7.3.0.3-3.x86_64 24/42 Installing : libobasis7.3-ogltrans-7.3.0.3-3.x86_64 25/42 Installing : libobasis7.3-postgresql-sdbc-7.3.0.3-3.x86_64 26/42 Installing : libobasis7.3-graphicfilter-7.3.0.3-3.x86_64 27/42 Installing : libobasis7.3-ooolinguistic-7.3.0.3-3.x86_64 28/42 Installing : libobasis7.3-extension-pdf-import-7.3.0.3-3.x86_64 29/42 Installing : libobasis7.3-onlineupdate-7.3.0.3-3.x86_64 30/42 Installing : libobasis7.3-extension-nlpsolver-7.3.0.3-3.x86_64 31/42 Installing : libobasis7.3-python-script-provider-7.3.0.3-3.x86_64 32/42 Installing : libobasis7.3-firebird-7.3.0.3-3.x86_64 33/42 Installing : libobasis7.3-extension-report-builder-7.3.0.3-3.x86_64 34/42 Installing : libobasis7.3-extension-javascript-script-provider-7.3.0.3-3.x86_64 35/42 Installing : libobasis7.3-extension-mediawiki-publisher-7.3.0.3-3.x86_64 36/42 Installing : libobasis7.3-gnome-integration-7.3.0.3-3.x86_64 37/42 Installing : libobasis7.3-extension-beanshell-script-provider-7.3.0.3-3.x86_64 38/42 Installing : libobasis7.3-libreofficekit-data-7.3.0.3-3.x86_64 39/42 Installing : libobasis7.3-xsltfilter-7.3.0.3-3.x86_64 40/42 Installing : libobasis7.3-kde-integration-7.3.0.3-3.x86_64 41/42 Installing : libreoffice7.3-freedesktop-menus-7.3.0-3.noarch 42/42 which: no update-desktop-database in (/sbin:/bin:/usr/sbin:/usr/bin:/usr/X11R6/bin) /bin/update-mime-database /bin/gtk-update-icon-cache which: no update-desktop-database in (/sbin:/bin:/usr/sbin:/usr/bin:/usr/X11R6/bin) which: no update-desktop-database in (/sbin:/bin:/usr/sbin:/usr/bin:/usr/X11R6/bin) Verifying : libobasis7.3-graphicfilter-7.3.0.3-3.x86_64 1/42 Verifying : libobasis7.3-ooolinguistic-7.3.0.3-3.x86_64 2/42 Verifying : libreoffice7.3-en-US-7.3.0.3-3.x86_64 3/42 Verifying : libobasis7.3-extension-pdf-import-7.3.0.3-3.x86_64 4/42 Verifying : libobasis7.3-draw-7.3.0.3-3.x86_64 5/42 Verifying : libobasis7.3-core-7.3.0.3-3.x86_64 6/42 Verifying : libobasis7.3-images-7.3.0.3-3.x86_64 7/42 Verifying : libobasis7.3-onlineupdate-7.3.0.3-3.x86_64 8/42 Verifying : libreoffice7.3-ure-7.3.0.3-3.x86_64 9/42 Verifying : libobasis7.3-math-7.3.0.3-3.x86_64 10/42 Verifying : libreoffice7.3-dict-en-7.3.0.3-3.x86_64 11/42 Verifying : libobasis7.3-base-7.3.0.3-3.x86_64 12/42 Verifying : libreoffice7.3-base-7.3.0.3-3.x86_64 13/42 Verifying : libreoffice7.3-dict-es-7.3.0.3-3.x86_64 14/42 Verifying : libobasis7.3-extension-nlpsolver-7.3.0.3-3.x86_64 15/42 Verifying : libobasis7.3-en-US-7.3.0.3-3.x86_64 16/42 Verifying : libobasis7.3-librelogo-7.3.0.3-3.x86_64 17/42 Verifying : libreoffice7.3-calc-7.3.0.3-3.x86_64 18/42 Verifying : libreoffice7.3-dict-fr-7.3.0.3-3.x86_64 19/42 Verifying : libobasis7.3-writer-7.3.0.3-3.x86_64 20/42 Verifying : libobasis7.3-python-script-provider-7.3.0.3-3.x86_64 21/42 Verifying : libobasis7.3-firebird-7.3.0.3-3.x86_64 22/42 Verifying : libobasis7.3-pyuno-7.3.0.3-3.x86_64 23/42 Verifying : libreoffice7.3-writer-7.3.0.3-3.x86_64 24/42 Verifying : libobasis7.3-extension-report-builder-7.3.0.3-3.x86_64 25/42 Verifying : libobasis7.3-extension-javascript-script-provider-7.3.0.3-3.x86_64 26/42 Verifying : libobasis7.3-extension-mediawiki-publisher-7.3.0.3-3.x86_64 27/42 Verifying : libobasis7.3-ogltrans-7.3.0.3-3.x86_64 28/42 Verifying : libobasis7.3-postgresql-sdbc-7.3.0.3-3.x86_64 29/42 Verifying : libobasis7.3-ooofonts-7.3.0.3-3.x86_64 30/42 Verifying : libobasis7.3-gnome-integration-7.3.0.3-3.x86_64 31/42 Verifying : libreoffice7.3-math-7.3.0.3-3.x86_64 32/42 Verifying : libreoffice7.3-draw-7.3.0.3-3.x86_64 33/42 Verifying : libobasis7.3-calc-7.3.0.3-3.x86_64 34/42 Verifying : libreoffice7.3-impress-7.3.0.3-3.x86_64 35/42 Verifying : libobasis7.3-impress-7.3.0.3-3.x86_64 36/42 Verifying : libreoffice7.3-freedesktop-menus-7.3.0-3.noarch 37/42 Verifying : libreoffice7.3-7.3.0.3-3.x86_64 38/42 Verifying : libobasis7.3-extension-beanshell-script-provider-7.3.0.3-3.x86_64 39/42 Verifying : libobasis7.3-libreofficekit-data-7.3.0.3-3.x86_64 40/42 Verifying : libobasis7.3-xsltfilter-7.3.0.3-3.x86_64 41/42 Verifying : libobasis7.3-kde-integration-7.3.0.3-3.x86_64 42/42 Installed: libobasis7.3-base.x86_64 0:7.3.0.3-3 libobasis7.3-calc.x86_64 0:7.3.0.3-3 libobasis7.3-core.x86_64 0:7.3.0.3-3 libobasis7.3-draw.x86_64 0:7.3.0.3-3 libobasis7.3-en-US.x86_64 0:7.3.0.3-3 libobasis7.3-extension-beanshell-script-provider.x86_64 0:7.3.0.3-3 libobasis7.3-extension-javascript-script-provider.x86_64 0:7.3.0.3-3 libobasis7.3-extension-mediawiki-publisher.x86_64 0:7.3.0.3-3 libobasis7.3-extension-nlpsolver.x86_64 0:7.3.0.3-3 libobasis7.3-extension-pdf-import.x86_64 0:7.3.0.3-3 libobasis7.3-extension-report-builder.x86_64 0:7.3.0.3-3 libobasis7.3-firebird.x86_64 0:7.3.0.3-3 libobasis7.3-gnome-integration.x86_64 0:7.3.0.3-3 libobasis7.3-graphicfilter.x86_64 0:7.3.0.3-3 libobasis7.3-images.x86_64 0:7.3.0.3-3 libobasis7.3-impress.x86_64 0:7.3.0.3-3 libobasis7.3-kde-integration.x86_64 0:7.3.0.3-3 libobasis7.3-librelogo.x86_64 0:7.3.0.3-3 libobasis7.3-libreofficekit-data.x86_64 0:7.3.0.3-3 libobasis7.3-math.x86_64 0:7.3.0.3-3 libobasis7.3-ogltrans.x86_64 0:7.3.0.3-3 libobasis7.3-onlineupdate.x86_64 0:7.3.0.3-3 libobasis7.3-ooofonts.x86_64 0:7.3.0.3-3 libobasis7.3-ooolinguistic.x86_64 0:7.3.0.3-3 libobasis7.3-postgresql-sdbc.x86_64 0:7.3.0.3-3 libobasis7.3-python-script-provider.x86_64 0:7.3.0.3-3 libobasis7.3-pyuno.x86_64 0:7.3.0.3-3 libobasis7.3-writer.x86_64 0:7.3.0.3-3 libobasis7.3-xsltfilter.x86_64 0:7.3.0.3-3 libreoffice7.3.x86_64 0:7.3.0.3-3 libreoffice7.3-base.x86_64 0:7.3.0.3-3 libreoffice7.3-calc.x86_64 0:7.3.0.3-3 libreoffice7.3-dict-en.x86_64 0:7.3.0.3-3 libreoffice7.3-dict-es.x86_64 0:7.3.0.3-3 libreoffice7.3-dict-fr.x86_64 0:7.3.0.3-3 libreoffice7.3-draw.x86_64 0:7.3.0.3-3 libreoffice7.3-en-US.x86_64 0:7.3.0.3-3 libreoffice7.3-freedesktop-menus.noarch 0:7.3.0-3 libreoffice7.3-impress.x86_64 0:7.3.0.3-3 libreoffice7.3-math.x86_64 0:7.3.0.3-3 libreoffice7.3-ure.x86_64 0:7.3.0.3-3 libreoffice7.3-writer.x86_64 0:7.3.0.3-3 Complete! [root@VM-12-15-centos RPMS]# 下载中文包wget --no-check-certificate https://mirrors.nju.edu.cn/tdf/libreoffice/stable/7.3.0/rpm/x86_64/LibreOffice_7.3.0_Linux_x86-64_rpm_langpack_zh-CN.tar.gz执行过程记录如下:[root@VM-12-15-centos RPMS]# cd ../../ [root@VM-12-15-centos soft]# wget --no-check-certificate https://mirrors.nju.edu.cn/tdf/libreoffice/stable/7.3.0/rpm/x86_64/LibreOffice_7.3.0_Linux_x86-64_rpm_langpack_zh-CN.tar.gz --2022-02-05 10:42:57-- https://mirrors.nju.edu.cn/tdf/libreoffice/stable/7.3.0/rpm/x86_64/LibreOffice_7.3.0_Linux_x86-64_rpm_langpack_zh-CN.tar.gz Resolving mirrors.nju.edu.cn (mirrors.nju.edu.cn)... 210.28.130.3, 2001:da8:1007:4011::3 Connecting to mirrors.nju.edu.cn (mirrors.nju.edu.cn)|210.28.130.3|:443... connected. HTTP request sent, awaiting response... 200 OK Length: 1090479 (1.0M) [application/octet-stream] Saving to: ‘LibreOffice_7.3.0_Linux_x86-64_rpm_langpack_zh-CN.tar.gz’ 100%[===============================================================================>] 1,090,479 5.40MB/s in 0.2s 2022-02-05 10:42:58 (5.40 MB/s) - ‘LibreOffice_7.3.0_Linux_x86-64_rpm_langpack_zh-CN.tar.gz’ saved [1090479/1090479] [root@VM-12-15-centos soft]# 解压中文包tar -zxvf LibreOffice_7.3.0_Linux_x86-64_rpm_langpack_zh-CN.tar.gz进入中文包安装目录安装中文包yum install -y *.rpm执行过程记录如下:[root@VM-12-15-centos RPMS]# yum install -y *.rpm Loaded plugins: fastestmirror, langpacks Repository epel is listed more than once in the configuration Examining libobasis7.3-zh-CN-7.3.0.3-3.x86_64.rpm: libobasis7.3-zh-CN-7.3.0.3-3.x86_64 Marking libobasis7.3-zh-CN-7.3.0.3-3.x86_64.rpm to be installed Examining libreoffice7.3-zh-CN-7.3.0.3-3.x86_64.rpm: libreoffice7.3-zh-CN-7.3.0.3-3.x86_64 Marking libreoffice7.3-zh-CN-7.3.0.3-3.x86_64.rpm to be installed Resolving Dependencies --> Running transaction check ---> Package libobasis7.3-zh-CN.x86_64 0:7.3.0.3-3 will be installed ---> Package libreoffice7.3-zh-CN.x86_64 0:7.3.0.3-3 will be installed --> Finished Dependency Resolution Dependencies Resolved ========================================================================================================================= Package Arch Version Repository Size ========================================================================================================================= Installing: libobasis7.3-zh-CN x86_64 7.3.0.3-3 /libobasis7.3-zh-CN-7.3.0.3-3.x86_64 3.6 M libreoffice7.3-zh-CN x86_64 7.3.0.3-3 /libreoffice7.3-zh-CN-7.3.0.3-3.x86_64 15 k Transaction Summary ========================================================================================================================= Install 2 Packages Total size: 3.6 M Installed size: 3.6 M Downloading packages: Running transaction check Running transaction test Transaction test succeeded Running transaction Installing : libobasis7.3-zh-CN-7.3.0.3-3.x86_64 1/2 Installing : libreoffice7.3-zh-CN-7.3.0.3-3.x86_64 2/2 Verifying : libobasis7.3-zh-CN-7.3.0.3-3.x86_64 1/2 Verifying : libreoffice7.3-zh-CN-7.3.0.3-3.x86_64 2/2 Installed: libobasis7.3-zh-CN.x86_64 0:7.3.0.3-3 libreoffice7.3-zh-CN.x86_64 0:7.3.0.3-3 Complete! [root@VM-12-15-centos RPMS]# 安装文档转换相关依赖库yum -y install cairo cups-libs libSM执行过程记录如下:[root@VM-12-15-centos RPMS]# yum -y install cairo cups-libs libSM Loaded plugins: fastestmirror, langpacks Repository epel is listed more than once in the configuration Loading mirror speeds from cached hostfile Package cairo-1.15.12-4.el7.x86_64 already installed and latest version Package 1:cups-libs-1.6.3-51.el7.x86_64 already installed and latest version Package libSM-1.2.2-2.el7.x86_64 already installed and latest version Nothing to do [root@VM-12-15-centos RPMS]# 安装中文字体1.创建中文字体目录mkdir -p /usr/share/fonts/chinese2.拷贝字体文件到中文字体目录,拷贝前将相关的字体文件上传到/soft/fonts/目录cp /soft/fonts/*.* /usr/share/fonts/chinese/3. 目录授权chmod -R 755 /usr/share/fonts/chinese4. 安装ttmkfdir来搜索目录中所有的字体信息,并汇总生成fonts.scale文件yum -y install ttmkfdir5. 执行ttmkfdir命令ttmkfdir -e /usr/share/X11/fonts/encodings/encodings.dir6.修改字体配置文件vi /etc/fonts/fonts.conf7. 在其他dir节点下加入如下字体文件索引目录<dir>/usr/share/fonts/chinese</dir>8. 刷新内存中的字体缓存fc-cache
-
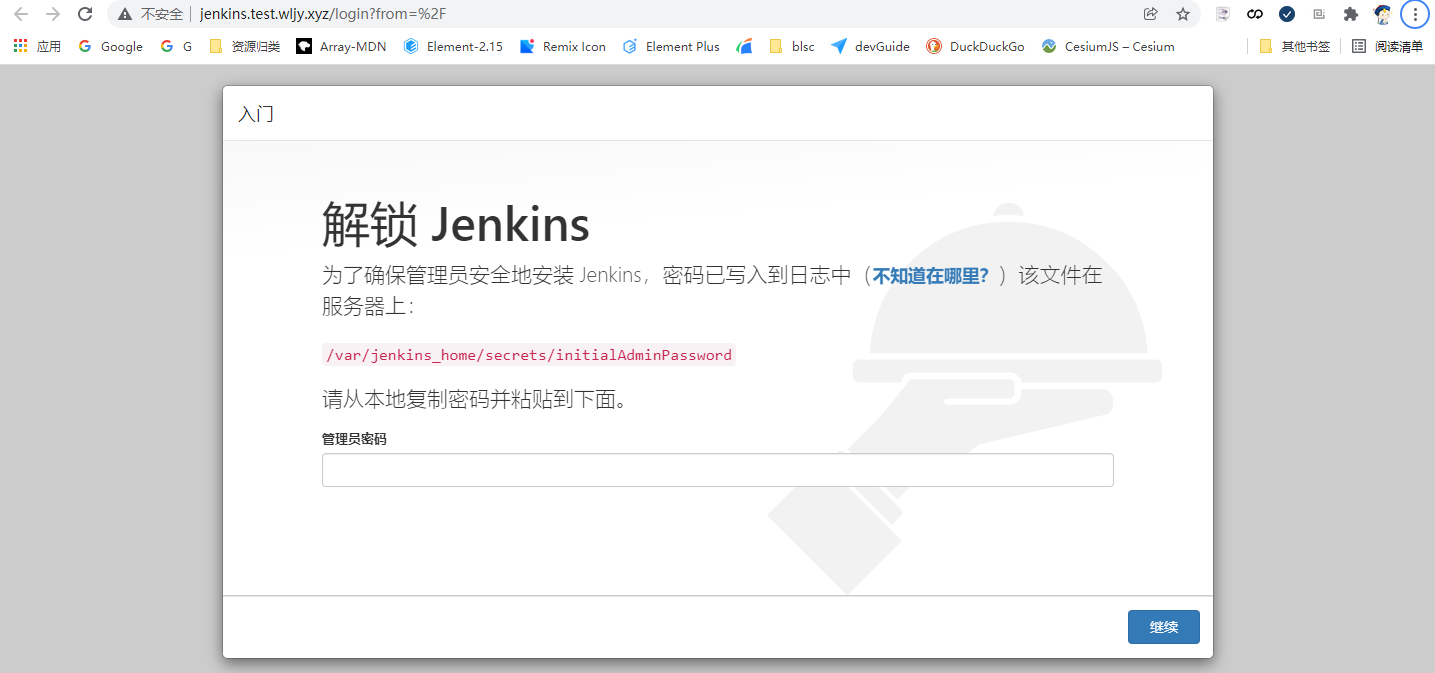
自动化项目部署系列:安装Jenkins 拉取镜像docker pull jenkins/jenkins:lts执行后显示如下信息:[zhuzl@VM-16-6-centos ~]$ sudo docker pull jenkins/jenkins:lts lts: Pulling from jenkins/jenkins 647acf3d48c2: Pull complete 832e288237bc: Pull complete ea194d1bd1da: Pull complete 98569593b9fd: Pull complete dfe249e8cdf2: Pull complete 0f6f2e6d37bb: Pull complete 07fcb98649b6: Pull complete 1e33c26b1882: Pull complete 7b24f0e29fe1: Pull complete 4d90ef3a8f3b: Pull complete d98c8e675bea: Pull complete b45fc2bf9fd7: Pull complete d6e1fda9effc: Pull complete 3635a44047f2: Pull complete 486e1776d3bc: Pull complete 41233d151800: Pull complete 14a67803c2b3: Pull complete Digest: sha256:c1d02293a08ba69483992f541935f7639fb10c6c322785bdabaf7fa94cd5e732 Status: Downloaded newer image for jenkins/jenkins:lts docker.io/jenkins/jenkins:lts [zhuzl@VM-16-6-centos ~]$ 创建磁盘卷sudo docker volume create jenkins_data执行后显示如下信息:[zhuzl@VM-16-6-centos ~]$ sudo docker volume create jenkins_data jenkins_data [zhuzl@VM-16-6-centos ~]$启动容器sudo docker run -d --name jenkins --restart always -p 8003:8080 -v jenkins_data:/var/jenkins_home jenkins/jenkins:lts执行后显示如下信息:[zhuzl@VM-16-6-centos ~]$ sudo docker run -d --name jenkins --restart always -p 8003:8080 -v jenkins_data:/var/jenkins_home jenkins/jenkins:lts ba1dc70b3621c93515eb818daf1600f50a54b441de102319f23152f98b6b7aec [zhuzl@VM-16-6-centos ~]$通过docker logs xxxx 查看控制台信息,显示如下信息:[zhuzl@VM-16-6-centos ~]$ sudo docker logs ba1d Running from: /usr/share/jenkins/jenkins.war webroot: EnvVars.masterEnvVars.get("JENKINS_HOME") 2022-01-28 09:13:17.975+0000 [id=1] INFO org.eclipse.jetty.util.log.Log#initialized: Logging initialized @469ms to org.eclipse.jetty.util.log.JavaUtilLog 2022-01-28 09:13:18.045+0000 [id=1] INFO winstone.Logger#logInternal: Beginning extraction from war file 2022-01-28 09:13:19.065+0000 [id=1] WARNING o.e.j.s.handler.ContextHandler#setContextPath: Empty contextPath 2022-01-28 09:13:19.126+0000 [id=1] INFO org.eclipse.jetty.server.Server#doStart: jetty-9.4.43.v20210629; built: 2021-06-30T11:07:22.254Z; git: 526006ecfa3af7f1a27ef3a288e2bef7ea9dd7e8; jvm 11.0.13+8 2022-01-28 09:13:19.360+0000 [id=1] INFO o.e.j.w.StandardDescriptorProcessor#visitServlet: NO JSP Support for /, did not find org.eclipse.jetty.jsp.JettyJspServlet 2022-01-28 09:13:19.395+0000 [id=1] INFO o.e.j.s.s.DefaultSessionIdManager#doStart: DefaultSessionIdManager workerName=node0 2022-01-28 09:13:19.396+0000 [id=1] INFO o.e.j.s.s.DefaultSessionIdManager#doStart: No SessionScavenger set, using defaults 2022-01-28 09:13:19.397+0000 [id=1] INFO o.e.j.server.session.HouseKeeper#startScavenging: node0 Scavenging every 660000ms 2022-01-28 09:13:19.829+0000 [id=1] INFO hudson.WebAppMain#contextInitialized: Jenkins home directory: /var/jenkins_home found at: EnvVars.masterEnvVars.get("JENKINS_HOME") 2022-01-28 09:13:20.000+0000 [id=1] INFO o.e.j.s.handler.ContextHandler#doStart: Started w.@3f049056{Jenkins v2.328,/,file:///var/jenkins_home/war/,AVAILABLE}{/var/jenkins_home/war} 2022-01-28 09:13:20.022+0000 [id=1] INFO o.e.j.server.AbstractConnector#doStart: Started ServerConnector@45e37a7e{HTTP/1.1, (http/1.1)}{0.0.0.0:8080} 2022-01-28 09:13:20.022+0000 [id=1] INFO org.eclipse.jetty.server.Server#doStart: Started @2518ms 2022-01-28 09:13:20.026+0000 [id=24] INFO winstone.Logger#logInternal: Winstone Servlet Engine running: controlPort=disabled 2022-01-28 09:13:20.249+0000 [id=31] INFO jenkins.InitReactorRunner$1#onAttained: Started initialization 2022-01-28 09:13:20.273+0000 [id=30] INFO jenkins.InitReactorRunner$1#onAttained: Listed all plugins 2022-01-28 09:13:20.985+0000 [id=32] INFO jenkins.InitReactorRunner$1#onAttained: Prepared all plugins 2022-01-28 09:13:20.990+0000 [id=31] INFO jenkins.InitReactorRunner$1#onAttained: Started all plugins 2022-01-28 09:13:20.995+0000 [id=35] INFO jenkins.InitReactorRunner$1#onAttained: Augmented all extensions 2022-01-28 09:13:21.409+0000 [id=35] INFO jenkins.InitReactorRunner$1#onAttained: System config loaded 2022-01-28 09:13:21.409+0000 [id=35] INFO jenkins.InitReactorRunner$1#onAttained: System config adapted 2022-01-28 09:13:21.409+0000 [id=35] INFO jenkins.InitReactorRunner$1#onAttained: Loaded all jobs 2022-01-28 09:13:21.410+0000 [id=35] INFO jenkins.InitReactorRunner$1#onAttained: Configuration for all jobs updated 2022-01-28 09:13:21.429+0000 [id=49] INFO hudson.model.AsyncPeriodicWork#lambda$doRun$1: Started Download metadata 2022-01-28 09:13:21.441+0000 [id=49] INFO hudson.util.Retrier#start: Attempt #1 to do the action check updates server WARNING: An illegal reflective access operation has occurred WARNING: Illegal reflective access by org.codehaus.groovy.reflection.CachedClass (file:/var/jenkins_home/war/WEB-INF/lib/groovy-all-2.4.21.jar) to method java.lang.Object.finalize() WARNING: Please consider reporting this to the maintainers of org.codehaus.groovy.reflection.CachedClass WARNING: Use --illegal-access=warn to enable warnings of further illegal reflective access operations WARNING: All illegal access operations will be denied in a future release 2022-01-28 09:13:21.779+0000 [id=35] INFO jenkins.install.SetupWizard#init: ************************************************************* ************************************************************* ************************************************************* Jenkins initial setup is required. An admin user has been created and a password generated. Please use the following password to proceed to installation: 8420f23681df4e6c90ca9babdb4c366a This may also be found at: /var/jenkins_home/secrets/initialAdminPassword ************************************************************* ************************************************************* ************************************************************* 2022-01-28 09:13:34.191+0000 [id=33] INFO jenkins.InitReactorRunner$1#onAttained: Completed initialization 2022-01-28 09:13:34.209+0000 [id=23] INFO hudson.WebAppMain$3#run: Jenkins is fully up and running [zhuzl@VM-16-6-centos ~]$通过 sudo docker inspect jenkins_data, 可查看磁盘卷在本地的目录:[zhuzl@VM-16-6-centos ~]$ sudo docker inspect jenkins_data [ { "CreatedAt": "2022-01-28T17:13:34+08:00", "Driver": "local", "Labels": {}, "Mountpoint": "/var/lib/docker/volumes/jenkins_data/_data", "Name": "jenkins_data", "Options": {}, "Scope": "local" } ] [zhuzl@VM-16-6-centos ~]$查看jenkins 密码:[zhuzl@VM-16-6-centos ~]$ sudo cat /var/lib/docker/volumes/jenkins_data/_data/secrets/initialAdminPassword 8420f23681df4e6c90ca9babdb4c366a [zhuzl@VM-16-6-centos ~]$ 访问Jenkins应用通过nginx 代理后,访问应用,界面效果如下:输入上面查看到的管理员密码信息:8420f23681df4e6c90ca9babdb4c366a,单击“下一步”按钮,显示loading界面:loading加载完成后,显示如下自定义配置界面:这里我选择“安装推荐的插件”,进入如下图所示的推荐插件安装界面:插件安装完成后,进入如下图所示的管理员设置界面:填写完管理员信息后,单击“保存并完成”按钮,进入如下图所示的实例配置界面:再次单击“保存并完成”按钮,显示如下图所示的“Jenkins已就绪!”界面单击“开始使用jenkins”按钮,进入如下图所示的 Jenkins 主界面:
-
使用docker-compose部署前端应用 公司测试服务器都使用docker compose 进行应用部署,之前没接触过,但是有不少项目在使用该方式,对相关的部署机制及命令做了简单了解后,开始尝试将近期开发的一个前端应用部署到测试服务器上部署目录:/root/zhuzl/monthly-report-ui/,该目录下有两个目录:一个 dist 为打包后的前端工程文件;一个 nginx为部署相关的目录。将打包后的文件上传到dist目录。在 nginx 目录添加如下文件:nginx.confuser nginx; worker_processes 1; error_log /var/log/nginx/error.log warn; pid /var/run/nginx.pid; events { worker_connections 1024; } http { include /etc/nginx/mime.types; default_type application/octet-stream; log_format main '$remote_addr - $remote_user [$time_local] "$request" ' '$status $body_bytes_sent "$http_referer" ' '"$http_user_agent" "$http_x_forwarded_for"'; access_log /var/log/nginx/access.log main; sendfile on; #tcp_nopush on; keepalive_timeout 65; #underscores_in_headers on; server { # listen 443 ssl; listen 80; server_name localhost; # ssl_certificate /usr/local/nginx/conf/server.crt; # ssl_certificate_key /usr/local/nginx/conf/server.key; root /usr/share/nginx/html; location /api/ { proxy_pass http://xxx/api/; proxy_redirect off; proxy_ignore_client_abort on; proxy_connect_timeout 600; proxy_send_timeout 600; proxy_read_timeout 600; proxy_pass_request_headers on; proxy_set_header Host $host; proxy_set_header X-Real-IP $remote_addr; proxy_set_header X-Forwarded-For $proxy_add_x_forwarded_for; } } }monthly-report-ui-docker-compose.ymlversion: '3' services: monthly-report-ui: #build: # context: . # dockerfile: Dockerfile image: nginx #image: rookiezoe/nginx #image: crunchgeek/nginx-pagespeed volumes: #- ./server.key:/usr/local/nginx/conf/server.key #- ./server.crt:/usr/local/nginx/conf/server.crt - ./nginx.conf:/etc/nginx/nginx.conf - ../dist:/usr/share/nginx/html #- ../helper:/usr/share/nginx/html/helper #- ../api-doc:/usr/share/nginx/html/api-doc ports: - "40001:80" #links: # - hydra #depends_on: # - hydra #environment: # - CONSOLE_VERSION=1.2 command: /bin/bash -c "exec nginx -g 'daemon off;'" networks: default: external: name: dev_oauth 安装以上方式准备好后,进入 nginx 目录,使用如下命令启动或停止应用:# 停止服务 docker-compose -f monthly-report-ui-docker-compose.yml down # 启动服务 docker-compose -f monthly-report-ui-docker-compose.yml up &服务启动后,即可使用http://<SERVER-IP>:40001访问应用本示例配置文件信息:monthly-report-ui.zip 以下内容已加密,请输入密码查看: